Like every other tech vendor, Google’s grand conference plans for 2020 changed. Instead of an in-person mega-event for cloud aficionados, we’re doing a (free!) nine week digital event called Google Cloud Next OnAir. Each week, starting July 14th, you get on-demand breakout sessions about a given theme. And there are ongoing demo sessions, learning opportunities, and 1:1s with Google Experts. Every couple weeks, I’ll highlight a few talks I’m looking forward to.
Before sharing my week one and week two picks, a few words on why you should care about this event. More than any other company, Google defines what’s “next” for customers and competitors alike. Don’t believe me? I researched a few of the tech inflection points of the last dozen years and Google’s fingerprints are all over them! If I’m wrong with any of this, don’t hesitate to correct me in the comments.
In 2008, Google launched Google App Engine (GAE), the first mainstream platform-as-a-service offering that introduced a compute model that obfuscated infrastructure. GAE (and Heroku) sparked an explosion of other products like Azure Web Apps, Cloud Foundry, AWS Elastic Beanstalk and others. I’m also fairly certain that the ideas behind PaaS led to the serverless+FaaS movement as well.
Google created Go and released the new language in 2009. It remains popular with developers, but has really taken off with platform builders. A wide range of open-source projects use Go, including Docker, Kubernetes, Terraform, Prometheus, Hugo, InfluxDB, Jaeger, CockroachDB, NATS, Cloud Foundry, etcd, and many more. It seems to be the language of distributed systems and the cloud.
Today, we think of data processing and AI/ML when we think of cloud computing, but that wasn’t always the case. Google had the first cloud-based data warehouse (BigQuery, in 2010) and AI/ML as a service by a cloud provider (Translate API, in 2011). And don’t forget Spanner, the distributed SQL database unveiled by Google in 2012 that inspired a host of other database vendors. We take for granted that every major public cloud now offers data warehouses, AI/ML services, and planet-scale databases. Seems like Google set the pace.
Keep going? Ok. The components emerging as the heart of the modern platform? Looks like container orchestration, service mesh, and serverless runtime. The CNCF 2019 survey shows that Kubernetes, Istio, and Knative play leading roles. All of those projects started at Google, and the industry picked up on each one. While, we were first to offer a managed Kubernetes service (GKE in 2015), now you find everyone offering one. Istio and Knative are also popping up all over. And our successful effort to embed all those technologies into a software-driven managed platform (Anthos, in 2019) may turn out to be the preferred model vs. a hyperconverged stack of software plus infrastructure.
Obviously, additional vendors and contributors have moved our industry forward over the past dozen years: Docker with approachable containerization, Amazon with AWS Lambda, social coding with GitHub, infrastructure-as-code from companies like HashiCorp, microservice and chaos engineering ideas from the likes of Netflix, and plenty of others. But I contend that no single vendor has contributed more value for the entire industry than Google. That’s why Next OnAir matters, as we’ll keep sharing tech that makes everything better.
Ok, enough blather. The theme of week one is “industry insights.” There’s also the analyst summit and partner summit, both with great content for those audiences. The general sessions I definitely want to watch:
Opening Keynote. Let’s see Google Cloud CEO Thomas Kurian do his thing.
Planning for Retail’s New Priorities. Every industry has felt impact from the pandemic, especially retail. I’m interested in learning more about what we’re doing there to help.
Next OnAir has a tremendous list of speakers, including customers and Google engineers sharing their insight. It’s free to sign up, you can watch at your leisure, and maybe, get a glimpse of what’s next.
Even during a global pandemic, people are job-hopping. Me, for one. Now, I recognize that many folks don’t have a lot of choices when looking for work. Sometimes you take whatever’s available, or decide to stay in a subpar situation to ride out an uncertain economy. At the same time, many of you do have options right now, and if you’re like me, are conscious of making the best choice possible. I was fortunate to have an executive coach for a period of time who helped me with a lot of things, including career planning. Kathrin O’Sullivan is fantastic—if you or your team can get her time, do everything you can to get it—and she gave me three simple, but powerful, pieces of advice that directly impacted my decision to join Google. It’ll probably impact every career decision I make from this point forward, honestly.
Don’t leave just because things get difficult. When tough times arrive, it’s easy to run for the exit. Maybe you got a new boss who’s kinda terrible. Or you’re about to go through a team or company merger. Your employer might be facing an existential crisis about their product-market fit and planning to retool. Or the work just doesn’t feel fun any longer. Any number of things might cause you to dust off the ol’ resume. While it may be a smart decision to leave, it might be smarter to stay around and get some experience navigating difficult waters. You might discover that sticking it out resulted in professional growth, and good times on the other side.
Run towards something, not away from something. When you have decided to do something else (within your company, or outside the company), make sure you’re excited about the new thing, not just eager to leave the old thing. If your primary goal is to “get outta here” then you might choose something uninspiring. This could lead to instant regret at the new place, and yet another cycle of job hunting.
Take the job that won’t be there in six months. I love this idea. If you’re fortunate enough to have options, ask yourself whether that job (or something similar) will be there later. If you turn it down now, could you find something similar six months down the road? Or is this a role/opportunity that feels like right-place-right-time? Depending on where you are in your career, you might be hunting for positions that uniquely challenge you. Those don’t show up all the time, and are worth waiting for.
The interwebs are full of career advice. Kathrin’s guidance stood out to me, and I hope you tuck it away for when you’re considering your next career move.
Earlier this year, I took a look at how Microsoft Azure supports Java/Spring developers. With my change in circumstances, I figured it was a good time to dig deep into Google Cloud’s offerings for Java developers. What I found was a very impressive array of tools, services, and integrations. More than I thought I’d find, honestly. Let’s take a tour.
Local developer environment
What stuff goes on your machine to make it easier to build Java apps that end up on Google Cloud?
Cloud Code extension for IntelliJ
Cloud Code is a good place to start. Among other things, it delivers extensions to IntelliJ and Visual Studio Code. For IntelliJ IDEA users, you get starter templates for new projects, snippets for authoring relevant YAML files, tool windows for various Google Cloud services, app deployment commands, and more. Given that 72% of Java developers use IntelliJ IDEA, this extension helps many folks.
Cloud Code in VS Code
The Visual Studio Code extension is pretty great too. It’s got project starters and other command palette integrations, Activity Bar entries to manage Google Cloud services, deployment tools, and more. 4% of Java devs use Visual Studio Code, so, we’re looking out for you too. If you use Eclipse, take a look at the Cloud Tools for Eclipse.
The other major thing you want locally is the Cloud SDK. Within this little gem you get client libraries for your favorite language, CLIs, and emulators. This means that as Java developers, we get a Java client library, command line tools for all-up Google Cloud (gcloud), Big Query (bq) and Storage (gsutil), and then local emulators for cloud services like Pub/Sub, Spanner, Firestore, and more. Powerful stuff.
App development
Our machine is set up. Now we need to do real work. As you’d expect, you can use all, some, or none of these things to build your Java apps. It’s an open model.
Java devs have lots of APIs to work with in the Google Cloud Java client libraries, whether talking to databases or consuming world-class AI/ML services. If you’re using Spring Boot—and the JetBrains survey reveals that the majority of you are—then you’ll be happy to discover Spring Cloud GCP. This set of packages makes it super straightforward to interact with terrific managed services in Google Cloud. Use Spring Data with cloud databases (including Cloud Spanner and Cloud Firestore), Spring Cloud Stream with Cloud Pub/Sub, Spring Caching with Cloud Memorystore, Spring Security with Cloud IAP, Micrometer with Cloud Monitoring, and Spring Cloud Sleuth with Cloud Trace. And you get the auto-configuration, dependency injection, and extensibility points that make Spring Boot fun to use. Google offers Spring Boot starters, samples, and more to get you going quickly. And it works great with Kotlin apps too.
Emulators available via gcloud
As you’re building Java apps, you might directly use the many managed services in Google Cloud Platform, or, work with the emulators mentioned above. It might make sense to work with local emulators for things like Cloud Pub/Sub or Cloud Spanner. Conversely, you may decide to spin up “real” instance of cloud services to build apps using Managed Service for Microsoft Active Directory, Secret Manager, or Cloud Data Fusion. I’m glad Java developers have so many options.
Where are you going to store your Java source code? One choice is Cloud Source Repositories. This service offers highly available, private Git repos—use it directly or mirror source code code from GitHub or Bitbucket—with a nice source browser and first-party integration with many Google Cloud compute runtimes.
Building and packaging code
After you’ve written some Java code, you probably want to build the project, package it up, and prepare it for deployment.
Artifact Registry
Store your Java packages in Artifact Registry. Create private, secure artifact storage that supports Maven and Gradle, as well as Docker and npm. It’s the eventual replacement of Container Registry, which itself is a nice Docker registry (and more).
Looking to build container images for your Java app? You can write your own Dockerfiles. Or, skip docker build|push by using our open source Jib as a Maven or Gradle plugin that builds Docker images. Jib separates the Java app into multiple layers, making rebuilds fast. A new project is Google Cloud Buildpacks which uses the CNCF spec to package and containerize Java 8|11 apps.
Odds are, your build and containerization stages don’t happen in isolation; they happen as part of a build pipeline. Cloud Build is the highly-rated managed CI/CD service that uses declarative pipeline definitions. You can run builds locally with the open source local builder, or in the cloud service. Pull source from Cloud Source Repositories, GitHub and other spots. Use Buildpacks or Jib in the pipeline. Publish to artifact registries and push code to compute environments.
Application runtimes
As you’d expect, Google Cloud Platform offers a variety of compute environments to run your Java apps. Choose among:
Bare Metal. Choose a physical machine to host your Java app. Choose from machine sizes with as few as 16 CPU cores, and as many as 112.
Google Kubernetes Engine. The first, and still the best, managed Kubernetes service. Get fully managed clusters that are auto scaled, auto patched, and auto repaired. Run stateless or stateful Java apps.
App Engine. One of the original PaaS offerings, App Engine lets you just deploy your Java code without worrying about any infrastructure management.
Cloud Functions. Run Java code in this function-as-a-service environment.
Cloud Run. Based on the open source Knative project, Cloud Run is a managed platform for scale-to-zero containers. You can run any web app that fits into a container, including Java apps.
Google Cloud VMware Engine. If you’re hosting apps in vSphere today and want to lift-and-shift your app over, you can use a fully managed VMware environment in GCP.
Running in production
Regardless of the compute host you choose, you want management tools that make your Java apps better, and help you solve problems quickly.
You might stick an Apigee API gateway in front of your Java app to secure or monetize it. If you’re running Java apps in multiple clouds, you might choose Google Cloud Anthos for consistency purposes. Java apps running on GKE in Anthos automatically get observability, transport security, traffic management, and SLO definition with Anthos Service Mesh.
You probably have lots of existing Java apps. Some are fairly new, others were written a decade ago. Google Cloud offers tooling to migrate many types of existing VM-based apps to container or cloud VM environments. There’s good reasons to do it, and Java apps see real benefits.
Migrate for Anthos takes an existing Linux or Windows VM and creates artifacts (Dockerfiles, Kubernetes YAML, etc) to run that workload in GKE. Migrate for Compute Engine moves your Java-hosting VMs into Google Compute Engine.
All-in-all, there’s a lot to like here if you’re a Java developer. You can mix-and-match these Google Cloud services and tools to build, deploy, run, and manage Java apps.
I rarely enjoy the last mile of work. Sure, there’s pleasure in seeing something reach its conclusion, but when I’m close, I just want to be done! For instance, when I create a Pluralsight course—my new one, Cloud Foundry: The Big Picture just came out—I enjoy the building part, and dread the record+edit portion. Same with writing software. I like coding an app to solve a problem. Then, I want a fast deployment so that I can see how the app works, and wrap up. Ideally, each app I write doesn’t require a unique set of machinery or know-how. Thus, I wanted to see if I could create a *single* Google Cloud Build deployment pipeline that shipped any custom app to the serverless Google Cloud Run environment.
Cloud Build is Google Cloud’s continuous integration and delivery service. It reminds me of Concourse in that it’s declarative, container-based, and lightweight. It’s straightforward to build containers or non-container artifacts, and deploy to VMs, Kubernetes, and more. The fact that it’s a hosted service with a great free tier is a bonus. To run my app, I don’t want to deal with configuring any infrastructure, so I chose Google Cloud Run as my runtime. It just takes a container image and offers a fully-managed, scale-to-zero host. Before getting fancy with buildpacks, I wanted to learn how to use Build and Run to package up and deploy a Spring Boot application.
First, I generated a new Spring Boot app from start.spring.io. It’s going to be a basic REST API, so all I needed was the Web dependency.
I’m not splitting the atom with this Java code. It simply returns a greeting when you hit the root endpoint.
@RestController
@SpringBootApplication
public class HelloAppApplication {
public static void main(String[] args) {
SpringApplication.run(HelloAppApplication.class, args);
}
@GetMapping("/")
public String SayHello() {
return "Hi, Google Cloud Run!";
}
}
Now, I wanted to create a pipeline that packaged up the Boot app into a JAR file, built a Docker image, and deployed that image to Cloud Run. Before crafting the pipeline file, I needed a Dockerfile. This file offers instructions on how to assemble the image. Here’s my basic one:
FROM openjdk:11-jdk
ARG JAR_FILE=target/hello-app-0.0.1-SNAPSHOT.jar
COPY ${JAR_FILE} app.jar
ENTRYPOINT ["java", "-Djava.security.edg=file:/dev/./urandom","-jar","/app.jar"]
On to the pipeline. A build configuration isn’t hard to understand. It consists of a series of sequential or parallel steps that produce an outcome. Each step runs in its own container image (specified in the name attribute), and if needed, there’s a simple way to transfer state between steps. My cloudbuild.yaml file for this Spring Boot app looked like this:
steps:
# build the Java app and package it into a jar
- name: maven:3-jdk-11
entrypoint: mvn
args: ["package", "-Dmaven.test.skip=true"]
# use the Dockerfile to create a container image
- name: gcr.io/cloud-builders/docker
args: ["build", "-t", "gcr.io/$PROJECT_ID/hello-app", "--build-arg=JAR_FILE=target/hello-app-0.0.1-SNAPSHOT.jar", "."]
# push the container image to the Registry
- name: gcr.io/cloud-builders/docker
args: ["push", "gcr.io/$PROJECT_ID/hello-app"]
#deploy to Google Cloud Run
- name: 'gcr.io/cloud-builders/gcloud'
args: ['run', 'deploy', 'seroter-hello-app', '--image', 'gcr.io/$PROJECT_ID/hello-app', '--region', 'us-west1', '--platform', 'managed']
images: ["gcr.io/$PROJECT_ID/hello-app"]
You’ll notice four steps. The first uses the Maven image to package my application. The result of that is a JAR file. The second step uses a Docker image that’s capable of generating an image using the Dockerfile I created earlier. The third step pushes that image to the Container Registry. The final step deploys the container image to Google Cloud Run with an app name of seroter-hello-app. The final “images” property puts the image name in my Build results.
As you can imagine, I can configure triggers for this pipeline (based on code changes, etc), or execute it manually. I’ll do the latter, as I haven’t stored this code in a repository anywhere yet. Using the terrific gcloud CLI tool, I issued a single command to kick off the build.
gcloud builds submit --config cloudbuild.yaml .
After a minute or so, I have a container image in the Container Registry, an available endpoint in Cloud Run, and a full audit log in Cloud Build.
Container Registry:
Cloud Run (with indicator that app was deployed via Cloud Build:
Cloud Build:
I didn’t expose the app publicly, so to call it, I needed to authenticate myself. I used the “gcloud auth print-identity-token” command to get a Bearer token, and plugged that into the Authorization header in Postman. As you’d expect, it worked. And when traffic dies down, the app scales to zero and costs me nothing.
So this was great. I did all this without having to install build infrastructure, or set up an application host. But I wanted to go a step further. Could I eliminate the Dockerization portion? I have zero trust in myself to build a good image. This is where buildpacks come in. They generate well-crafted, secure container images from source code. Google created a handful of these using the CNCF spec, and we can use them here.
My new cloudbuild.yaml file looks like this. See that I’ve removed the steps to package the Java app, and build and push the Docker image, and replaced them with a single “pack” step.
steps:
# use Buildpacks to create a container image
- name: 'gcr.io/k8s-skaffold/pack'
entrypoint: 'pack'
args: ['build', '--builder=gcr.io/buildpacks/builder', '--publish', 'gcr.io/$PROJECT_ID/hello-app-bp:$COMMIT_SHA']
#deploy to Google Cloud Run
- name: 'gcr.io/cloud-builders/gcloud'
args: ['run', 'deploy', 'seroter-hello-app-bp', '--image', 'gcr.io/$PROJECT_ID/hello-app-bp:latest', '--region', 'us-west1', '--platform', 'managed']
With the same gcloud command (gcloud builds submit --config cloudbuild.yaml .) I kicked off a new build. This time, the streaming logs showed me that the buildpack built the JAR file, pulled in a known-good base container image, and containerized the app. The result: a new image in the Registry (21% smaller in size, by the way), and a fresh service in Cloud Run.
I started out this blog post saying that I wanted a single cloudbuild.yaml file for *any* app. With Buildpacks, that seemed possible. The final step? Tokenizing the build configuration. Cloud Build supports “substitutions” which lets you offer run-time values for variables in the configuration. I changed my build configuration above to strip out the hard-coded names for the image, region, and app name.
steps:
# use Buildpacks to create a container image
- name: 'gcr.io/k8s-skaffold/pack'
entrypoint: 'pack'
args: ['build', '--builder=gcr.io/buildpacks/builder', '--publish', 'gcr.io/$PROJECT_ID/$_IMAGE_NAME:$COMMIT_SHA']
#deploy to Google Cloud Run
- name: 'gcr.io/cloud-builders/gcloud'
args: ['run', 'deploy', '$_RUN_APPNAME', '--image', 'gcr.io/$PROJECT_ID/$_IMAGE_NAME:latest', '--region', '$_REGION', '--platform', 'managed']
Before trying this with a new app, I tried this once more with my Spring Boot app. For good measure, I changed the source code so that I could confirm that I was getting a fresh build. My gcloud command now passed in values for the variables:
After a minute, the deployment succeeded, and when I called the endpoint, I saw the updated API result.
For the grand finale, I want to take this exact file, and put it alongside a newly built ASP.NET Core app. I did a simple “dotnet new webapi” and dropped the cloudbuild.yaml file into the project folder.
After tweaking the Program.cs file to read the application port from the platform-provided environment variable, I ran the following command:
A few moments later, I had a container image built, and my ASP.NET Core app listening to requests in Cloud Run.
Calling that endpoint (with authentication) gave me the API results I expected.
Super cool. So to recap, that six line build configuration above works for your Java, .NET Core, Python, Node, and Go apps. It’ll create a secure container image that works anywhere. And if you use Cloud Build and Cloud Run, you can do all of this with no mess. I might actually start enjoying the last mile of app development with this setup.
Today’s my blog-iversary! Fifteen years ago today, a nobody announced to absolutely no one that he was “getting rolling” with a blog at Microsoft. Seven hundred posts and a million+ words later, this nobody is still publishing with regularity. Throughout all sorts of changes in life, this has been a constant for me, and maybe, some of you. I’ve learned a few things along the way, and figured I’d share some of them.
Keep a backlog so you don’t get stuck.
I’m not a big “list” guy. I don’t have a todo list. But blogging is different. I like blogs that have a heartbeat, or regularly rhythm of content. That’s hard to maintain if you’re constantly staring at a blank page and panicking about what to write. So, I keep a running tally of things that are interesting to me and warrant a blog post.
If you’re wondering how you’ll come up with anything to write, let alone a steady stream of material, I’d suggest widening your perspective. For example, don’t pressure yourself to write an essay every week. Maybe you create a list, like I am right now. Or you review someone’s book, video, or conference presentation. Start an interview series. Aggregate interesting links into a weekly or monthly post. Do some “hello world” material for newcomers to your technology domain. Few people I know can just crank out brilliant material on the fly. It’s ok to plan, and switch around your format.
Create your own blog.
My blogging career has now stretched through nine roles at five companies—seven if you count the acquiring company of two of them. If all my material lived on corporate blogs, I’d be stuck with a fractured resume. After I left Microsoft, I decided on a standalone blog, and that ended up being a great decision. I still published regularly on the blogs of my employer, but I always kept my own site as well.
You’ve got lots of choices today. Use something like a hosted WordPress or Medium blog, stand up your own instance, or take advantage of static site generators. Regardless, set up your own brand that survives role changes, job changes, and life changes.
Write the headline first.
This probably violates some longstanding rule of writing. I’m a rebel. I like having my thesis defined up front, and writing a headline helps focus me on what the rest of the content should address.
Struggle writing headlines? That’s fine. Write the content and then figure out how to summarize it. Whatever order you do it in, make sure you always start with your “point.” Why are you writing this? What are you trying to get across to the reader? Is it a call to action? Personally, I can’t just start writing and see where it ends up. I need to know where I’m going.
Simplify your publishing process.
Don’t overthink this. You should spend most of your time writing, and as little time as possible getting your material online. In the beginning, I spent too much time switching tools, and fidgeting around with layouts. When you’re staring at all that busywork, it can dissuade you from writing in the first place.
Now? I publish to WordPress which has built-in formatting for code, and simple configuration. I often write using Hemingway App to ensure I’m not too wordy. I create screenshots with SnagIt, and animated GIFs with Camtasia. Both Docker and the public cloud have made it easier to spin up demo environments. That’s about it. Make it simple.
Recognize that engagement changes over time.
In the early blogging days, I did zero self-promotion. I wrote a blog. People subscribed via RSS, and we chatted via comments. There wasn’t Twitter. LinkedIn was a weird place. No, it was just the wild-west of Internet content, where corporate blogs were few, and RSS readers were plentiful.
Now? I see more micro-sharing on social media, versus long-form posts. RSS feeds are hidden on sites, if they exist at all. Comments on blog post themselves are rare. Instead of being stubborn and nostalgic, I modernized along the way. Instead of assuming people would find me, I’m better about broadcasting and engaging in other places. I’m still uncomfortable with advertising myself, and you may be too, but if you don’t do some of it, you’ll get lost in a sea of alternatives.
Remember who you’re writing for.
You may write a blog to provides notes to your future self. If you’re writing just for you, totally fine. I suspect that most people write a blog to share information with others. If that’s the case, always think about that person’s experience.
350340
Don’t erect walls of text. Use paragraphs. Use images. Use headers. Write posts using language that normal humans use, versus the synergistic thought-leadering of a marketing bot. Don’t use your blog to show off how smart you are, but rather, write so that others can understand and get smarter themselves. That doesn’t mean talking down to people, but rather, writing clearly and in a helpful way.
That’s all I got. I hope to be writing for another fifteen years, and that many of you will stick with me for it!
This week I’m once again speaking at INTEGRATE, a terrific Microsoft-oriented conference focused on app integration. This may be the last year I’m invited, so before I did my talk, I wanted to ensure I was up-to-speed on Google Cloud’s integration-related services. One that I was aware of, but not super familiar with, was Google Cloud Pub/Sub. My first impression was that this was a standard messaging service like Amazon SQS or Azure Service Bus. Indeed, it is a messaging service, but it does more.
Here are three unique aspects to Pub/Sub that might give you a better way to solve integration problems.
#1 – Global control plane with multi-region topics
When creating a Pub/Sub topic—an object that accepts a feed of messages—you’re only asked one major question: what’s the ID?
In the other major cloud messaging services, you select a geographic region along with the topic name. While you can, of course, interact with those messaging instances from any other region via the API, you’ll pay the latency cost. Not so with Pub/Sub. From the documentation (bolding mine):
Cloud Pub/Sub offers global data access in that publisher and subscriber clients are not aware of the location of the servers to which they connect or how those services route the data.
…
Pub/Sub’s load balancing mechanisms direct publisher traffic to the nearest GCP data center where data storage is allowed, as defined in the ResourceLocation Restriction section of the IAM & admin console. This means that publishers in multiple regions may publish messages to a single topic with low latency. Any individual message is stored in a single region. However, a topic may have messages stored in many regions. When a subscriber client requests messages published to this topic, it connects to the nearest server which aggregates data from all messages published to the topic for delivery to the client.
That’s a fascinating architecture, and it means you get terrific publisher performance from anywhere.
#2 – Supports both pull and push subscriptions for a topic
Messaging queues typically store data until it’s retrieved by the subscriber. That’s ideal for transferring messages, or work, between systems. Let’s see an example with Pub/Sub.
I first used the Google Cloud Console to create a pull-based subscription for the topic. You can see a variety of other settings (with sensible defaults) around acknowledgement deadlines, message retention, and more.
I then created a pair of .NET Core applications. One pushes messages to the topic, another pulls messages from the corresponding subscription. Google created NuGet packages for each of the major Cloud services—which is better than one mega-package that talks to all services—that you can see listed here on GitHub. Here’s the Pub/Sub package that added to both projects.
using Google.Cloud.PubSub.V1;
using Google.Protobuf;
...
public string PublishMessages()
{
PublisherServiceApiClient publisher = PublisherServiceApiClient.Create();
//create messages
PubsubMessage message1 = new PubsubMessage {Data = ByteString.CopyFromUtf8("Julie")};
PubsubMessage message2 = new PubsubMessage {Data = ByteString.CopyFromUtf8("Hazel")};
PubsubMessage message3 = new PubsubMessage {Data = ByteString.CopyFromUtf8("Frank")};
//load into a collection
IEnumerable<PubsubMessage> messages = new PubsubMessage[] {
message1,
message2,
message3
};
//publish messages
PublishResponse response = publisher.Publish("projects/seroter-anthos/topics/seroter-topic", messages);
return "success";
}
After I ran the publisher app, I switched to the web-based Console and saw that the subscription had three un-acknowledged messages. So, it worked.
The subscribing app? Equally straightforward. Here, I asked for up to ten messages associated with the subscription, and once I processed then, I sent “acknowledgements” back to Pub/Sub. This removes the messages from the queue so that I don’t see them again.
using Google.Cloud.PubSub.V1;
using Google.Protobuf;
...
public IEnumerable<String> ReadMessages()
{
List<string> names = new List<string>();
SubscriberServiceApiClient subscriber = SubscriberServiceApiClient.Create();
SubscriptionName subscriptionName = new SubscriptionName("seroter-anthos", "sub1");
PullResponse response = subscriber.Pull(subscriptionName, true, 10);
foreach(ReceivedMessage msg in response.ReceivedMessages) {
names.Add(msg.Message.Data.ToStringUtf8());
}
if(response.ReceivedMessages.Count > 0) {
//ack the message so we don't receive it again
subscriber.Acknowledge(subscriptionName, response.ReceivedMessages.Select(m => m.AckId));
}
return names;
}
When I start up the subscriber app, it reads the three available messages in the queue. If I pull from the queue again, I get no results (as expected).
As an aside, the Google Cloud Console is really outstanding for interacting with managed services. I built .NET Core apps to test out Pub/Sub, but I could have done everything within the Console itself. I can publish messages:
And then retrieve those message, with an option to acknowledge them as well:
Great stuff.
But back to the point of this section, I can use Pub/Sub to create pull subscriptions and push subscriptions. We’ve been conditioned by cloud vendors to expect distinct services for each variation in functionality. One example is with messaging services, where you see unique services for queuing, event streaming, notifications, and more. Here with Pub/Sub, I’m getting a notification service and queuing service together. A “push” subscription doesn’t wait for the subscriber to request work; it pushes the message to the designated (optionally, authenticated) endpoint. You might provide the URL of an application webhook, an API, a function, or whatever should respond immediately to your message.
I like this capability, and it simplifies your architecture.
#3 – Supports message replay within an existing subscription and for new subscriptions
One of the things I’ve found most attractive about event processing engines is the durability and replay-ability functionality. Unlike a traditional message queue, an event processor is based on a durable log where you can rewind and pull data from any point. That’s cool. Your event streaming engine isn’t a database or system of record, but a useful snapshot in time of an event stream. What if you could get the queuing semantics you want, with that durability you like from event streaming? Pub/Sub does that.
This again harkens back to point #2, where Pub/Sub absorbs functionality from other specialized services. Let me show you what I found.
When creating a subscription (or editing an existing one), you have the option to retain acknowledged messages. This keeps these messages around for whatever the duration is for the subscription (up to seven days).
To try this out, I sent in four messages to the topic, with bodies of “test1”, “test2”, “test3”, and “test4.” I then viewed, and acknowledged, all of them.
If I do another “pull” there are no more messages. This is standard queuing behavior. An empty queue is a happy queue. But what if something went wrong downstream? You’d typically have to go back upstream and resubmit the message. Because I saved acknowledged messages, I can use the “seek” functionality to replay!
Hey now. That’s pretty wicked. When I pull from the subscription again, any message after the date/time specified shows up again.
And I get unlimited bites at this apple. I can choose to replay again, and again, and again. You can imagine all sorts of scenarios where this sort of protection can come in handy.
Ok, but what about new subscribers? What about a system that comes online and wants a batch of messages that went through the system yesterday? This is where snapshots are powerful. They store the state of any unacknowledged messages in the subscription, and any new messages published after the snapshot was taken. To demonstrate this, I sent in three more messages, with bodies of “test 5”, “test6” and “test7.” Then I took a snapshot on the subscription.
I read all the new messages from the subscription, and acknowledged them. Within this Pub/Sub subscription, I chose to “replay”, load the snapshot, and saw these messages again. That could be useful if I took a snapshot pre-deploy of code changes, something went wrong, and I wanted to process everything from that snapshot. But what if I want access to this past data from another subscription?
I created a new subscription called “sub3.” This might represent a new system that just came online, or even a tap that wants to analyze the last four days of data. Initially, this subscription has no associated messages. That makes sense; it only sees messages that arrived after the subscription was created. From this additional subscription, I chose to “replay” and selected the existing snapshot.
After that, I went to my subscription to view messages, and I saw the three messages from the other subscription’s snapshot.
Wow, that’s powerful. New subscribers don’t always have to start from scratch thanks to this feature.
It might be worth it for you to take an extended look at Google Cloud Pub/Sub. It’s got many of the features you expect from a scaled cloud service, with a few extra features that may delight you.
Didn’t see that coming, did you? Honestly, me neither. My past four years at Pivotal/VMware were life-altering, and I’m so proud of what we accomplished, and I’m amazed by the talent of the folks there. I wasn’t looking to leave, and you might have guessed ten other possible destinations. When the Google folks reached out about an intriguing leadership opportunity, I listened. And here we are. I couldn’t be more excited about it!
What will I be doing? Google Cloud is introducing an Outbound Product Management function, and I’ll build and lead the team for the Application Modernization product area. Wait, what’s outbound product management? This team acts as the voice of the product to the market, and the voice of the market back to the product. We’ll own the customer-facing roadmap, assist with go-to-market messaging and strategy, create impactful demonstrations, analyze the competitive landscape, build deep relationships with customers and analysts, and help people get the most out of the technology. These are all the things I love doing, and with a focus area that represents the present (Hybrid) and future (Edge) of cloud computing.
Why did I say “yes” to the job and why should you say “yes” as a customer? A few things stood out to me as I assessed Google’s opportunity in the market, and how they could uniquely help you do amazing things with technology.
The Engineering
Most of us choose to rely on Google products dozens of times per day. Often without even thinking about it. And it all “just works” from anywhere on the planet. How? Search, Maps, YouTube, Google Home, and GSuite run atop the most sophisticated and powerful infrastructure platform ever built. And you and I can take advantage of that platform in our own software applications by using Google Cloud. That’s awesome.
Besides being a world-class infrastructure company, Google has proven to be an incredible research organization. So much of that research finds its way into your hands, and into the open for others to use. There’s almost an embarrassing number of Google-originated open source projects that millions of you depend on: Apache Beam, Android, Angular, Dart, Flutter, Go, Kubernetes, Istio, Knative, Tensorflow, and so many more. Google doesn’t need to do marketing to convince you they’re an advocate for open source software; they just keep supporting and contributing OSS people actually use!
I’m a big believer that the long-term value of (public) cloud is managed services. A managed compute layer, database, load balancer, build service, analytics platform, or machine learning engine adds so much value by (1) removing day-to-day operational tasks and (2) giving you access to continuous innovation. With Google Cloud, you get our unparalleled engineering prowess powering world-class managed services. And there’s no ambiguity in our goal: get the most value by directly using the public cloud. We’re not protecting any existing product lines or trying to sell you an OS license. Even with the hybrid cloud story, we’re making sure you can take immediate advantage of the full cloud!
There’s a trope thrown around in tech circles that says “you’re not Google.” The somewhat condescending message is that you don’t have Google-scale problems, so don’t over-engineer your solutions to act like them. Hey, make smart choices, sure. But Google’s not you, either. How about we learn from each other, and solve hard problems together? Having Google’s innovators and engineers on your team seems like an advantage.
Perks of working on @GCPcloud: – Need feedback on a k8s-related dev experience proposal? @bgrant0607 is already reading your doc, – An issue with .Net? CC @jonskeet, – Node.js question? Hey @MylesBorins – Want to hear pain points? @kelseyhightower already sent you a DM, …
For better or worse, I’ve spent my entire 20+ year career focused on big companies, either as an employee of one, consultant, or vendor. Within the enterprise, it’s difficult to introduce sudden change, but there’s a hunger for improvement. Google Cloud strikes an ideal balance between familiarity and progress. We do that by upleveling your impression of what “good enough” looks like.
Often, public cloud vendors offer “good enough” services that feel like the bare minimum. Let’s give enterprises more than “ok” so that their decade-long bet on a platform generates a revolutionary leap for them. Google Cloud offers the best-in-class for modern office productivity with GSuite, the gold standard for Kubernetes with GKE, and the game-changing data warehouse in BigQuery. And so much more of Google Cloud feels familiar, but better:
Compute. Choose from VMs, single-tenant nodes, bare metal servers, serverless containers, and more. Including a fully managed VMware service.
Databases. Sure, you have managed NoSQL databases like Bigtable, Firestore, and Memorystore. But also get (familiar, but better) managed SQL Server, and the world-class Spanner database.
Data processing. I like that Google doesn’t offer 100 ways to do the same thing. In this space, there are discrete tools for workflow, data stream processing, and messaging. Most of it open source and portable.
Networking and security. This is critical to success, and to establishing a modern architecture. Over their own fiber network, you get unique options for routing, workload protection and isolation. Plus you get a usable identity management system and account hierarchy system. And a familiar, but better managed Active Directory.
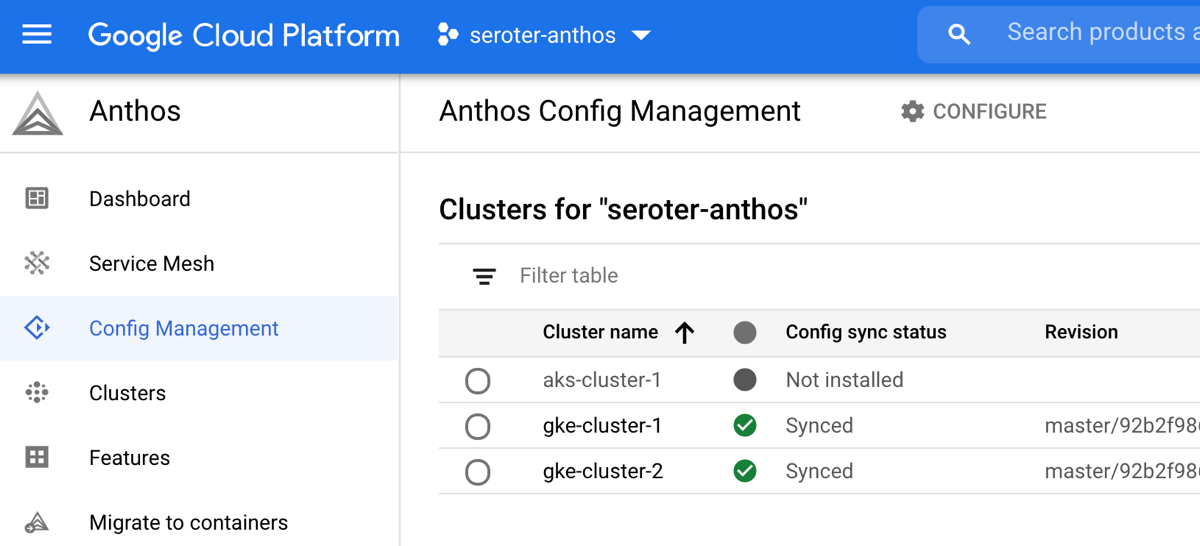
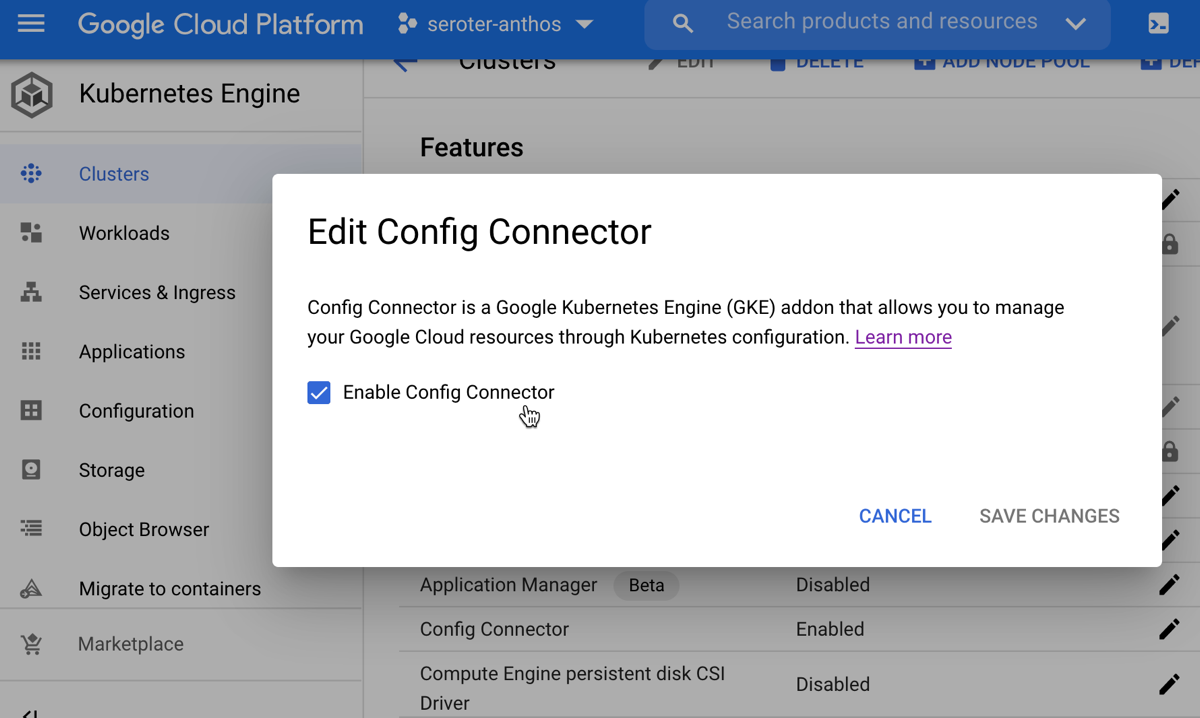
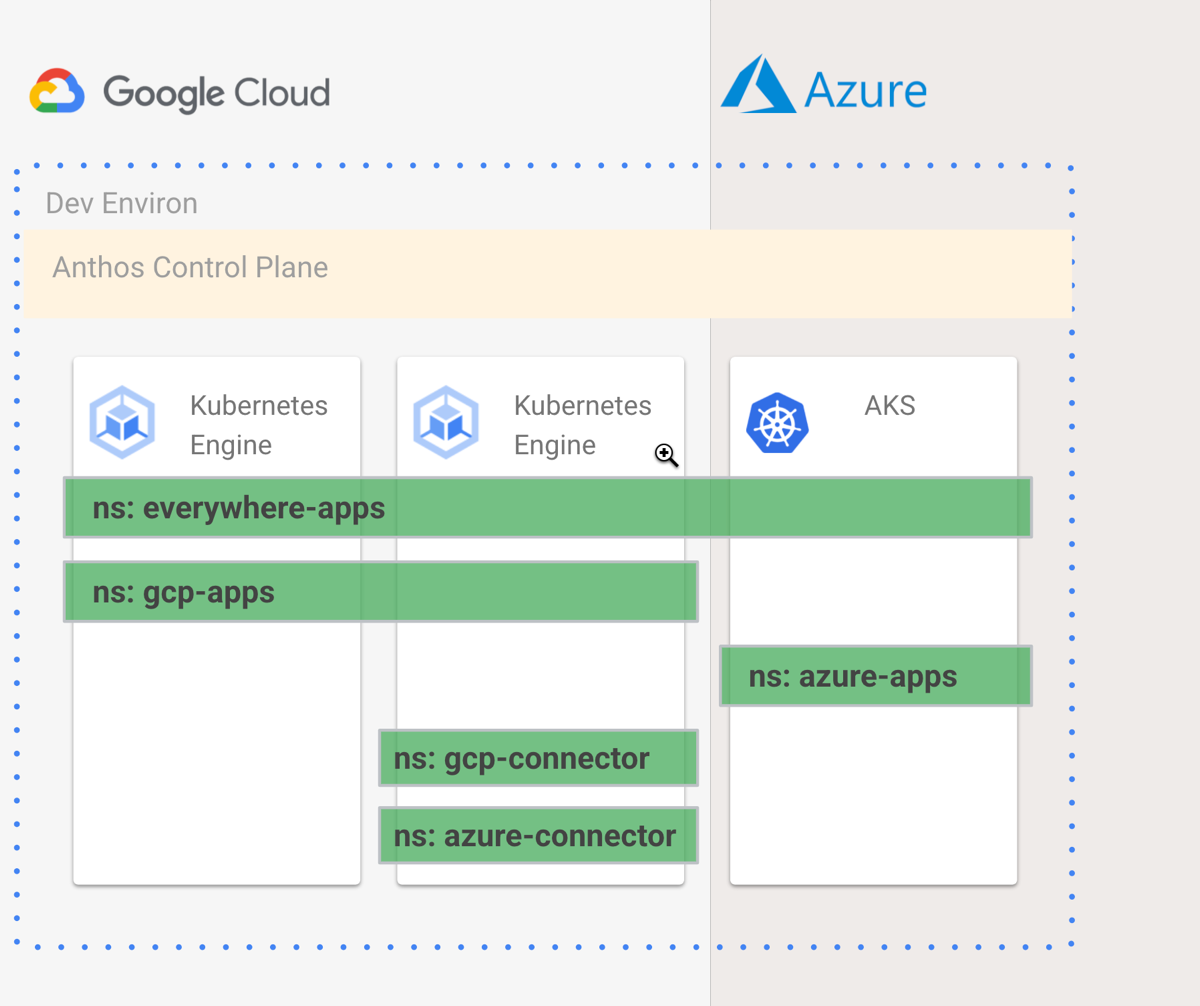
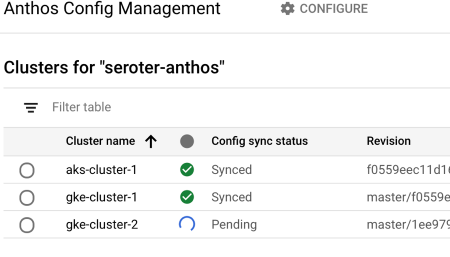
Hybrid, edge, and multi-cloud. Here’s where I’ll spend my time. This story is unique and a big deal for enterprises. You want the best-in-class Kubernetes, everywhere? And centralized configuration, a modern app build system, serverless computing, and service mesh? All based on open source software? Meet Anthos. It’s a portable, software-driven platform that doesn’t require a hyperconverged infrastructure stack, or an epic financial commitment to use. It’s a secure managed platform that runs on-premises, in GCP, at the edge, or even in other public clouds. Anthos aims to help you modernize faster, shrink your ops costs, and make it easier to use the best of the cloud from anywhere. Sign me up.
It’s not just about building new stuff. It’s about supporting the existing portfolio too. I like Google’s innovation in how to manage systems. Their Site Reliability Engineering (SRE) practices are a legit step forward, and offering that to you with Customer Reliability Engineering is so valuable. Modernization is the name of the game today, and products like Migrate for Anthos are a generational shift in how you get current workloads into lower-cost, more manageable environments. Google’s still learning this “enterprise” thing, but I really like what’s there so far.
Google Cloud just feels … different. The management console doesn’t make me want to light myself on fire. It’s got a clean UI and is easy to use. The compute layer is top notch and my old Pivotal colleagues used it exclusively to build and run their software. It’s affordable, performant, and reliable. Services in the platform appear thoughtfully integrated and have sensible default settings. There aren’t dozens of ways to do the same thing. Everything feels fresh and innovative, and you don’t get the sense that you’re wrestling with legacy architectural decisions.
They’ve got a generous forever-free tier of usage for many products. The billing process isn’t hostile, and they were the first to offer things like sustained use discounts, and they make it easy to set account-wide budgets to prevent runaway costs. It’s like we want you to use the public cloud without a lot of drama!
I’m going to do my part to make sure that the enterprise experience with Google Cloud is exceptional. And I also want to make sure you’re not settling for “good enough” when you should expect more, and better.
As you can imagine, my “default” cloud changes from Microsoft Azure to Google Cloud Platform. After twelve years as a Microsoft MVP, I withdrew from the program. It was an honor to be a part of it, and I’ve made lifelong friends as a result. Switching communities will be a strange experience!
I plan to continue blogging with regularity, will continue my role at InfoQ, and have no plans to stop creating Pluralsight courses. I’ll keep comparing technologies and trying new things. That won’t change. But do expect me to be a full-throated advocate for GCP.
Thanks for joining me on the journey so far, and I hope you’ll stick with me as we learn new things together!
Most apps use databases. This is not a shocking piece of information. If your app is destined to run in a public cloud, how do you work with cloud-only databases when doing local development? It seems you have two choices:
Provision and use an instance of the cloud database. If you’re going to depend on a cloud database, you can certainly use it directly during local development. Sure, there might be a little extra latency, and you’re paying per hour for that instance. But this is the most direct way to do it.
Install and use a local version of that database. Maybe your app uses a cloud DB based on installable software like Microsoft SQL Server, MongoDB, or PostgreSQL. In that case, you can run a local copy (in a container, or natively), code against it, and swap connection strings as you deploy to production. There’s some risk, as it’s not the EXACT same environment. But doable.
A variation of choice #2 is when you select a cloud database that doesn’t have an installable equivalent. Think of the cloud-native, managed databases like Amazon DynamoDB, Google Cloud Spanner, and Azure Cosmos DB. What do you do then? Must you choose option #1 and work directly in the cloud? Fortunately, each of those cloud databases now has a local emulator. This isn’t a full-blown instance of that database, but a solid mock that’s suitable for development. In this post, I’ll take a quick look at the above mentioned emulators, and what you should know about them.
#1 Amazon DynamoDB
Amazon’s DynamoDB is a high-performing NoSQL (key-value and document) database. It’s a full-featured managed service that transparently scales to meet demand, supports ACID transactions, and offers multiple replication options.
DynamoDB Local is an emulator you can run anywhere. AWS offers a few ways to run it, including a direct download—it requires Java to run—or a Docker image. I chose the downloadable option and unpacked the zip file on my machine.
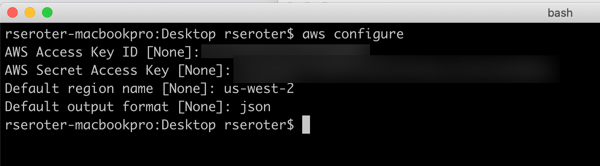
Before you can use it, you need credentials set up locally. Note that ANY credentials will do (they don’t have to be valid) for it to work. If you have the AWS CLI, you can simply do an aws configure command to generate a credentials file based on your AWS account.
The JAR file hosting the emulator has a few flags you can choose at startup:
You can see that you have a choice of running this entirely in-memory, or use the default behavior which saves your database to disk. The in-memory option is nice for quick testing, or running smoke tests in an automated pipeline. I started up DynamoDB Local with the following command, which gave me a shared database file that every local app will connect to:
This gave me a reachable instance on port 8000. Upon first starting it up, there’s no database file on disk. As soon as I issued a database query (in another console, as the emulator blocks after it starts up), I saw the database file.
Let’s try using it from code. I created a new Node Express app, and added an npm reference to the AWS SDK for JavaScript. In this app, I want to create a table in DynamoDB, add a record, and then query that record. Here’s the complete code:
const express = require('express')
const app = express()
const port = 3000
var AWS = require("aws-sdk");
//region doesn't matter for the emulator
AWS.config.update({
region: "us-west-2",
endpoint: "http://localhost:8000"
});
//dynamodb variables
var dynamodb = new AWS.DynamoDB();
var docClient = new AWS.DynamoDB.DocumentClient();
//table configuration
var params = {
TableName : "Animals",
KeySchema: [
{ AttributeName: "animal_id", KeyType: "HASH"}, //Partition key
{ AttributeName: "species", KeyType: "RANGE" } //Sort key
],
AttributeDefinitions: [
{ AttributeName: "animal_id", AttributeType: "S" },
{ AttributeName: "species", AttributeType: "S" }
],
ProvisionedThroughput: {
ReadCapacityUnits: 10,
WriteCapacityUnits: 10
}
};
// default endpoint
app.get('/', function(req, res, next) {
res.send('hello world!');
});
// create a table in DynamoDB
app.get('/createtable', function(req, res) {
dynamodb.createTable(params, function(err, data) {
if (err) {
console.error("Unable to create table. Error JSON:", JSON.stringify(err, null, 2));
res.send('failed to create table')
} else {
console.log("Created table. Table description JSON:", JSON.stringify(data, null, 2));
res.send('success creating table')
}
});
});
//create a variable holding a new data item
var animal = {
TableName: "Animals",
Item: {
animal_id: "B100",
species: "E. lutris",
name: "sea otter",
legs: 4
}
}
// add a record to DynamoDB table
app.get('/addrecord', function(req, res) {
docClient.put(animal, function(err, data) {
if (err) {
console.error("Unable to add animal. Error JSON:", JSON.stringify(err, null, 2));
res.send('failed to add animal')
} else {
console.log("Added animal. Item description JSON:", JSON.stringify(data, null, 2));
res.send('success added animal')
}
});
});
// define what I'm looking for when querying the table
var readParams = {
TableName: "Animals",
Key: {
"animal_id": "B100",
"species": "E. lutris"
}
};
// retrieve a record from DynamoDB table
app.get('/getrecord', function(req, res) {
docClient.get(readParams, function(err, data) {
if (err) {
console.error("Unable to read animal. Error JSON:", JSON.stringify(err, null, 2));
res.send('failed to read animal')
} else {
console.log("Read animal. Item description JSON:", JSON.stringify(data, null, 2));
res.send(JSON.stringify(data, null, 2))
}
});
});
//start up app
app.listen(port);
It’s not great, but it works. Yes, I’m using a GET To create a record. This is a free site, so you’ll take this code AND LIKE IT.
After starting up the app, I can create a table, create a record, and find it.
Because data is persisted, I can stop the emulator, start it up later, and everything is still there. That’s handy.
As you can imagine, this emulator isn’t an EXACT clone of a global managed service. It doesn’t do anything with replication or regions. The “provisioned throughput” settings which dictate read/write performance are ignored. Table scans are done sequentially and parallel scans aren’t supported, so that’s another performance-related thing you can’t test locally. Also, read operations are all eventually consistent, but things will be so fast, it’ll seem strongly consistent. There are a few other considerations, but basically, use this to build apps, not to do performance tests or game-day chaos exercises.
#2 Google Cloud Spanner
Cloud Spanner is a relational database that Google says is “built for the cloud.” You get the relational database traits including schema-on-write, strong consistency, and ANSI SQL syntax, with some NoSQL database traits like horizontal scale and great resilience.
Just recently, Google Cloud released a beta emulator. The Cloud Spanner Emulator stores data in memory and works with their Java, Go, and C++ libraries. To run the emulator, you need Docker on your machine. From there, you can either use the gcloud CLI to run it, a pre-built Docker image, Linux binaries, and more. I’m going to use the gcloud CLI that comes with the Google Cloud SDK.
I ran a quick update of my existing SDK, and it was cool to see it pull in the new functionality. Kicking off emulation from the CLI is a developer-friendly idea.
Starting up the emulator is simple: gcloud beta emulators spanner start. The first time it runs, the CLI pulls down the Docker image, and then starts it up. Notice that it opens up all the necessary ports.
I want to make sure my app doesn’t accidentally spin up something in the public cloud, so I create a separate gcloud configuration that points at my emulator and uses the project ID of “seroter-local.”
gcloud config configurations create emulator
gcloud config set auth/disable_credentials true
gcloud config set project seroter-local
gcloud config set api_endpoint_overrides/spanner http://localhost:9020/
Next, I create a database instance. Using the CLI, I issue a command creating an instance named “spring-demo” and using the local emulator configuration.
Instead of building an app from scratch, I’m using one of the Spring examples created by the Google Cloud team. Their go-to demo for Spanner uses their library that already recognizes the emulator, if you provide a particular environment variable. This demo uses Spring Data to work with Spanner, and serves up web endpoints for interacting with the database.
In the application package, the only file I had to change was the application.properties. Here, I specified project ID, instance ID, and database to create.
In the terminal window where I’m going to run the app, I set two environment variables. First, I set SPANNER_EMULATOR_HOST=localhost:9010. As I mentioned earlier, the Spanner library for Java looks for this value and knows to connect locally. Secondly, I set a pointer to my GCP service account credentials JSON file: GOOGLE_APPLICATION_CREDENTIALS=~/Downloads/gcp-key.json. You’re not supposed to need creds for local testing, but my app wouldn’t start without it.
Finally, I compile and start up the app. There are a couple ways this app lets you interact with Spanner, and I chose the “repository” one:
After a second or two, I see that the app compiled, and data got loaded into the database.
Pinging the endpoint in the browser gives a RESTful response.
Like with the AWS emulator, the Google Cloud Spanner emulator doesn’t do everything that its managed counterpart does. It uses unencrypted traffic, identity management APIs aren’t supported, concurrent read/write transactions get aborted, there’s no data persistence, quotas aren’t enforced, and monitoring isn’t enabled. There are also limitations during the beta phase, related to the breadth of supported queries and partition operations. Check the GitHub README for a full list.
#3 Microsoft Azure Cosmos DB
Now let’s look at Azure’s Cosmos DB. This is billed as a “planet scale” NoSQL database with easy scaling, multi-master replication, sophisticated transaction support, and support for multiple APIs. It can “talk” Cassandra, MongoDB, SQL, Gremlin, or Etcd thanks to wire-compatible APIs.
Microsoft offers the Azure Cosmos Emulator for local development. Somewhat inexplicably, it’s available only as a Windows download or Windows container. That surprised me, given the recent friendliness to Mac and Linux. Regardless, I spun up a Windows 10 environment in Azure, and chose the downloadable option.
Once it’s installed, I see a graphical experience that closely resembles the one in the Azure Portal.
From here, I use this graphical UI and build out a new database, container—not an OS container, but the name of a collection—and specify a partition key.
For fun, I added an initial database record to get things going.
Nice. Now I have a database ready to use from code. I’m going to use the same Node.js app I built for the AWS demo above, but this time, reference the Azure SDK (npm install @azure/cosmos) to talk to the database. I also created a config.json file that stores, well, config values. Note that there is a single fixed account and well-known key for all users. These aren’t secret.
Finally, the app code itself. It’s pretty similar to what I wrote earlier for DynamoDB. I have an endpoint to add a record, and another one to retrieve records.
When I start the app, I call the endpoint to create a record, see it show up in Cosmos DB, and issue another request to get the records that match the target “species.” Sure enough, everything works great.
What’s different about the emulator, compared to the “real” Cosmos DB? The emulator UI only supports the SQL API, not the others. You can’t use the adjustable consistency levels—like strong, session, or eventual—for queries. There are limits on how many containers you can create, and there’s no concept of replication here. Check out the remaining differences on the Azure site.
All three emulators are easy to set up and straightforward to use. None of them are suitable for performance testing or simulating production resilience scenarios. That’s ok, because the “real” thing is just a few clicks (or CLI calls) away. Use these emulators to iterate on your app locally, and maybe to simulate behaviors in your integration pipelines, and then spin up actual instances for in-depth testing before going live.
Let’s get this out of the way: I don’t like the term “personal brand.” It feels … pretentious. Manufactured. Narcissistic. That said, how we represent ourselves to the outside world matters. Allegedly, 85% of US recruiters say online reputation influences hiring decisions. Besides impacting your job prospects, a good “brand” gives you a more influential voice, and the prospect of extra income on the side. I claim very little expertise here, but with fifteen+ years of doing public stuff, I’ve learned a few things.
First, let’s define personal brand. I’ve heard it described as “the means by which people remember you“, “combination of reputation and credibility that can be wielded to amplify messages“, “the combination of what people think I am and my ‘style‘”, and “who you are, what you stand for, the values you embrace, and the way in which you express those values.” What do you think when you see or hear people like Martha Stewart, Elon Musk, Dwayne “The Rock” Johnson, Oprah Winfrey, Seth Godin, Gene Kim, Kelsey Hightower, Charity Majors, Corey Quinn, or Nicole Forsgren? You think SOMETHING. They’ve left a durable mark.
Building a reputation or brand is hard. Sustaining it over time is extremely hard. As my colleague Coté told me, you have to “show up a lot and for a long time.” It takes intentional planning, and ongoing effort. It’s hard to just stumble into a durable personal brand. You need to make conscious choices. Worth it? I think so. In no particular order, here’s what I’ve learned about building and sustaining personal brands.
10. Recognize the characteristics of effective “messengers.”
The authors of the book Messengers say “we tend to judge an idea not on its merits, but according to how we judge the person putting it forward.” They put forth eight types of messengers, four “hard”—based on superior status—and four “soft”—based on connectedness. Which one will/does represent your brand?
Hard messengers use:
Socio-economic position. We listen to these people because they appear to be successful in life.
Expertise/experience. These messengers are listened to because of real or perceived competence.
Dominance. This messenger shows dominance over others and is given an advantage.
Attractiveness. You’re more effective when you are seen as physically attractive.
Soft messengers use:
Warmth. These people show positivity, compassion and humility.
Vulnerability. This messenger shares vulnerabilities—past failures, current concerns and doubts—and is deemed credible.
Trustworthiness. Trust is foundational to human interaction, and we believe that these messengers are giving it to us straight.
Charisma. This messenger demonstrates self-confidence, energy, creativity, and eloquence.
Any of these look familiar to you? Resemble someone you know? Neither category is “right” or “wrong” but certain messenger types are more effective in a given situation. Know what type you are, or want to be.
9. Be good at something.
What do you want to be known for? Audit yourself and review any feedback others have given you. What are the skills, passion areas, and values that surface? These could be specific hard skills—Java programming, AWS databases, identity management, cloud architecture—or “soft” skills—ability to learn, curiosity, quick wit.
It probably goes without saying, but also don’t forget to keep investing in that skill area. Even remarkable talent can become stale to observers. I just finished a great Harry Houdini biography, and it was fascinating to see how peopled tired of his amazing act, and he was driven to keep improving it.
8. Have a focus area.
Some of the best personal brands are specific. They don’t cover a giant spectrum. They focus primarily on one thing. Charity Majors owns observability. You know that she’ll go deep on that topic and make you smarter. Corey Quinn primarily covers AWS. Nicole Forsgren is a go-to person for insight about DevOps and business performance. Same with Gene Kim who you can count on for everything DevOps. And a Kelsey Hightower covers a fairly wide range of technology, but mostly around cloud and app runtimes.
Your “focus” could be how you approach things, versus a technology domain. Maybe you record video interviews. Or do introductory exploration into a host of different things. It could be that you do deep investigative research. Regardless, ensure that you say something. Have opinions. Within your focus area, have a point of view and openly share it.
7.Define your target audience.
You won’t be everything to everyone. Ideally, you build up a brand that attracts the audience you care about. Your choice of audience impacts your choice of channel and topic. A group of followers on Instagram probably expect something different from those on LinkedIn or Twitch. Twitter might bring a different crowd that the conferences you speak at. Where should you be to meet and woo the people you’re after?
Some of this audience definition also includes analysis. Is your audience primarily in the UK? Consider that timezone and culture when you tweet or publish blog posts. Are you chasing the after work, do-it-yourself crowd? Consider talking to those folks in the evenings. Also look at what material performs, versus falls flat. Maybe your focus area or channel isn’t resonating with your target audience. Observe, orient, decide, act. Don’t just throw stuff out there randomly hoping to grab people. Be intentional and constantly test and adjust.
Also, actively consider how much topical variance your audience will tolerate, and if you care. I personally think the “follow the whole person” idea is naive. While I want to know you’re human being (see #4 below), I’m probably following you because of a topic that interests me (see #8 above). The audience gives you leeway to go “off topic” but to a point. If you spend significant time on alternative topics—be it your personal life, politics, sports—expect that your audience size will fluctuate. It’s your brand, do what you want with it.
6. Be a content creator.
This is probably the most important thing for long term success. You need to relentlessly generate content that reflects the reputation you want. Your content is how you “prove” your brand. Otherwise, it’s just talk and wishful thinking.
That said, what is “content”? Sure, blog posts, articles, and whitepapers matter. But that’s not the full scope, nor required. You might create videos or training classes. Or record podcasts. Maybe you create slides and infographics. You could be a prolific public speaker at events. Or create GitHub repos full of example projects. Even tweets count as content, and many tech influencers tweet a heck of a lot more than they write long form pieces.
I’ll even argue that content aggregation or amplification counts. That is, you might create a weekly newsletter that summarizes content created by others. Or regularly tweet or share interesting material. Your brand may be centered around digesting and filtering content for the community.
5. Invest in your digital presence.
How are you discoverable and reachable? Do you have a consistent “brand” across digital sites? Decide which channels you want to use, and ensure that people can readily find you.
Consider how you can “own” your digital brand. Pick up a personalized domain name, and use that for your email addresses as well. Don’t necessarily rely solely on other people’s properties to host your content. By that, I mean be careful if everything you’ve done only lives on Medium, Youtube, Instagram, LinkedIn, or any other number of sites that own your content. At minimum, back up your content to make sure you have options if one of those sites becomes unfriendly!
4. Be authentic and relatable.
To me, it’s hard to fake an image for a very long time. It’s possible, sure. Maybe I’m not the cheerful techie I present myself to be, and in reality, am a horrifying monster. I mean, I hope not but DON’T YOU WANT TO KNOW.
No, a good personal brand feels like you’re getting to know the person. Maybe not TOO much (see #7) but enough that builds trust and connection with the audience. Don’t hide behind jargon or clichés to present yourself as someone you’re not. Be yourself, get comfortable with some level of vulnerability, and try to be consistent in how you behave.
3. Follow the example set by others.
The Farnam Street blog had a great post a couple weeks ago that highlighted that complete originality is overrated and we should “steal” from others. While I don’t encourage you to directly mimic someone else to build your brand, we should observe and take inspiration from others.
Do you admire someone’s snarky tone and think you can do something similar? Cool, do it. Like the short form blog posts that someone writes? Copy that. Does your tech hero engage directly in two-way Twitter conversations that build their credibility and trustworthiness? Do it too. Explore some of the tech people you admire, and see if you can offer your own twist on how they talk, how they present, what they write, and where they publish.
2. Brace yourself for criticism.
Building and sustaining a brand won’t be a lovefest. By putting yourself out there, you are actively inviting comment and criticism. If you don’t want that or can’t handle it, don’t put yourself out there. It doesn’t mean you have to like it, or tolerate harassing trolls. But it does come with the territory.
Recognize that we obsess over the bad, and forget the good stuff. Read The Power of Bad for a terrific deep dive into this tendency. What happens when you get thirty positive reviews for a conference talk, and one negative one? If you’re like me, you obsess over the negative one. Who was that? Why are they so awful? I memory-hole the positive and get brought down by the negative. Recognize this natural behavior, and push back against it. Rather, use criticism to fuel improvement, and your reaction to criticism may even become part of your brand!
1. Don’t fear reinvention.
Life is unpredictable. Things change over time. Don’t be held hostage by your personal brand. You’ll face new challenges, new jobs, and new perspectives. Any of those might trigger an evolution of your brand. Professional athletes do this when they retire and take on new business ventures, some actors change genres, and plenty of technologists adjust their brand as the industry changes.
Certain parts of your brand are durable, and you should capture those. You may switch your focus to a new technology or domain, but keep your publishing schedule and writing style the same. You could evolve from a DBA to a cloud architect, and shed your old video-watching audience while building a new one. If you’re facing a dramatic reinvention, it’s worth re-introducing yourself and explaining what to expect.
Wrap up
There are plenty of good reasons to invest in building a personal brand. It’s also a lot of work, and you might not think it’s worth it. That’s reasonable too. One could easily spend dozens of hours per week to sustain it. Others may be able to maintain a satisfactory personal brand by investing a couple of hours per month. Hopefully your biggest takeaway here is that building a personal brand is an intentional act, and requires conscious effort!
It’s been nine years since I first tried out Cloud Foundry, and it remains my favorite app platform. It runs all kinds of apps, has a nice dev UX for deploying and managing software, and doesn’t force me to muck with infrastructure. The VMware team keeps shipping releases (another today) of the most popular packaging of Cloud Foundry, Tanzu Application Service (TAS). One knock against Cloud Foundry has been its weight—in typically runs on dozens of VMs. Others have commented on its use of open-source, but not widely-used, components like BOSH, the Diego scheduler, and more. I think there are good justifications for its size and choice of plumbing components, but I’m not here to debate that. Rather, I want to look at what’s next. The new Tanzu Application Service (TAS) for Kubernetes (now in beta) eliminates those prior concerns with Cloud Foundry, and just maybe, leapfrogs other platforms by delivering the dev UX you like, with the underlying components—things like Kubernetes, Cluster API, Istio, Envoy, fluentd, and kpack—you want. Let me show you.
TAS runs on any Kubernetes cluster: on-premises or in the cloud, VM-based or a managed service, VMware-provided or delivered by others. It’s based on the OSS Cloud Foundry for Kubernetes project, and available for beta download with a free (no strings attached) Tanzu Network account. You can follow along with me in this post, and in just a few minutes, have a fully working app platform that accepts containers or source code and wires it all up for you.
Step 1 – Download and Start Stuff (5 minutes)
Let’s get started. Some of these initial steps will go away post-beta as the install process gets polished up. But we’re brave explorers, and like trying things in their gritty, early stages, right?
First, we need a Kubernetes. That’s the first big change for Cloud Foundry and TAS. Instead of pointing it at any empty IaaS and using BOSH to create VMs, Cloud Foundry now supports bring-your-own-Kubernetes. I’m going to use Minikube for this example. You can use KinD, or any other number of options.
Install kubectl (to interact with the Kubernetes cluster), and then install Minikube. Ensure you have a recent version of Minikube, as we’re using the Docker driver for better performance. With Minikube installed, execute the following command to build out our single-node cluster. TAS for Kubernetes is happiest running on a generously-sized cluster.
After a minute or two, you’ll have a hungry Kubernetes cluster running, just waiting for workloads.
We also need a few command line tools to get TAS installed. These tools, all open source, do things like YAML templating, image building, and deploying things like Cloud Foundry as an “app” to Kubernetes. Install the lightweight kapp, klbd, and ytt tools using these simple instructions.
You also need the Cloud Foundry command line tool. This is for interacting with the environment, deploying apps, etc. This same CLI works against a VM-based Cloud Foundry, or Kubernetes-based one. You can download the latest version via your favorite package manager or directly.
Finally, you’ll want to install the BOSH CLI. Wait a second, you say, didn’t you say BOSH wasn’t part of this? Am I just a filthy liar? First off, no name calling, you bastards. Secondly, no, you don’t need to use BOSH, but the CLI itself helps generate some configuration values we’ll use in a moment. You can download the BOSH CLI via your favorite package manager, or grab it from the Tanzu Network. Install via the instructions here.
I downloaded the archive to my desktop, unpacked it, and renamed the folder “tanzu-application-service.” Create a sibling folder named “configuration-values.”
Now we’re going to create the configuration file. Run the following command in your console, which should be pointed at the tanzu-application-service directory. The first quoted value is the domain. For my local instance, this value is vcap.me. When running this in a “real” environment, this value is the DNS name associated with your cluster and ingress point. The output of this command is a new file in the configuration-values folder.
After a couple of seconds, we have an impressive-looking YAML file with passwords, certificates, and all sorts of delightful things.
We’re nearly done. Our TAS environment won’t just run containers; it will also use kpack and Cloud Native Buildpacks to generate secure container images from source code. That means we need a registry for stashing generated images. You can use most any one you want. I’m going to use Docker Hub. Thus, the final configuration values we need are appended to the above file. First, we need the credentials to the Tanzu Network for retrieving platform images, and secondly, credentials for container registry.
With our credentials in hand, add them to the very bottom of the file. Indentation matters, this is YAML after all, so ensure you’ve got it lined up right.
The last thing? There’s a file that instructs the installation to create a cluster IP ingress point versus a Kubernetes load balancer resource. For Minikube (and in public cloud Kubernetes-as-a-Service environments) I want the load balancer. So, within the tanzu-application-service folder, move the replace-loadbalancer-with-clusterip.yaml file from the custom-overlays folder to the config-optional folder.
Finally, to be safe, I created a copy of this remove-resource-requirements.yml file and put it in the custom-overlays folder. It relaxes some of the resource expectations for the cluster. You may not need it, but I saw CPU exhaustion issues pop up when I didn’t use it.
All finished. Let’s deploy this rascal.
Step 3 – Deploy Stuff (10 minutes)
Deploying TAS to Kubernetes takes 5-9 minutes. With your console pointed at the tanzu-application-service directory, run this command:
./bin/install-tas.sh ../configuration-values
There’s a live read-out of progress, and you can also keep checking the Kubernetes environment to see the pods inflate. Tools like k9s make it easy to keep an eye on what’s happening. Notice the Istio components, and some familiar Cloud Foundry pieces. Observe that the entire Cloud Foundry control plane is containerized here—no VMs anywhere to be seen.
While this is still installing, let’s open up the Minikube tunnel to expose the LoadBalancer service our ingress gateway needs. Do this in a separate console window, as its a blocking call. Note that the installation can’t complete until you do it!
minikube tunnel
After a few minutes, we’re ready to deploy workloads.
Step 4 – Test Stuff (3 minutes)
We now have a full-featured Tanzu Application Service up and running. Neat. Let’s try a few things. First, we need to point the Cloud Foundry CLI at our environment.
cf api --skip-ssl-validation https://api.vcap.me
Great. Next, we log in, using generated cf_admin_password from the deployment-values.yaml file.
cf auth admin <password>
After that, we’ll enable containers in the environment.
cf enable-feature-flag diego_docker
Finally, we set up a tenant. Cloud Foundry natively supports isolation between tenants. Here, I set up an organization, and within that organization, a “space.” Finally, I tell the Cloud Foundry CLI that we’re working with apps in that particular org and space.
Let’s do something easy, first. Push a previously-containerized app. Here’s one from my Docker Hub, but it can be anything you want.
cf push demo-app -o rseroter/simple-k8s-app-kpack
After you enter that command, 15 seconds later you have a hosted, routable app. The URL is presented in the Cloud Foundry CLI.
How about something more interesting? TAS for Kubernetes supports a variety of buildpacks. These buildpacks detect the language of your app, and then assemble a container image for you. Right now, the platform builds Java, .NET Core, Go, and Node.js apps. To make life simple, clone this sample Node app to your machine. Navigate your console to that folder, and simple enter cf push.
After a minute or so, you end up with a container image in whatever registry you specified (for me, Docker Hub), and a running app.
This beta release of TAS for Kubernetes also supports commands around log streaming (e.g. cf logs cf-nodejs), connecting to backing services like databases, and more. And yes, even the simple, yet powerful, cf scale command works to expand and contract pod instances.
It’s simple to uninstall the entire TAS environment from your Kubernetes cluster with a single command:
kapp delete -a cf
Thanks for trying this out with me! If you only read along, and want to try it yourself later, read the docs, download the bits, and let me know how it goes.