In an ideal world, all your apps have good test coverage, get deployed continuously via pipelines, scale gracefully, and laugh in the face of component failure. That is decidedly not the world we live in. Yes, cloud-native apps are the goal for many, but that’s not what most people have stashed in their data center. Can those apps take some advantage of cloud platforms? For example, what if I had a classic ASP.NET Web Forms app that depends on local storage, but needs better scalability? I could refactor the app—and that might be the right thing to do—or do my best to take advantage of VM-level scaling options in the public cloud. In this demo, I’ll take the aforementioned app, and get it running Azure VM Scale Sets without any code changes.
I’ve been messing with Azure VM Scale Sets as part of a new Pluralsight course that I’m almost done building. The course is all about creating highly-available architectures on Microsoft Azure. Scale Sets make it easy to build and manage fleets of identical virtual machines. In our case here, I want to take an ASP.NET app and throw it into a Scale Set. This exercise requires four steps:
- Create and configure a Windows virtual machine in Microsoft Azure. Install IIS, deploy the app, and make sure everything works.
- Turn the virtual machine into an image. Sysprep the machine and create an image in Azure for the Scale Set to use.
- Create the Azure VM Scale Set. Run a command, watch it go. Configure the load balancer to route traffic to the fleet.
- Create a custom extension to update the configuration on each server in the fleet. IIS gets weird on sysprep, so we need Azure to configure each existing (and new) server.
Ok, let’s do this.
Step 1: Create and configure a Windows virtual machine in Microsoft Azure.
While I could take a virtual machine from on-premises and upload it, let’s start from scratch and build a fresh environment.
First off, I went to the Microsoft Azure portal and initiated the build of a new Windows Server VM.

After filling out the required fields and triggering the build, I had a snazzy new VM after a few minutes. I clicked the “connect” button on the portal to get a local RDP file with connection details.

Before connecting the VM, I needed to set up a file share. This ASP.NET app reads files from a file location, then submits the content to an endpoint. If the app uses local storage, then that’s a huge problem for scalability. If that VM disappears, so does the data! So we want to use a durable network file share that a bunch of VMs can share. Fortunately, Azure has such a service.
I went into the Azure Portal and provisioned a new storage account, and then set up the file structure that my app expects.

How do I get my app to use this? My ASP.NET app gets its target file location from a configuration property in its web.config file. No need to chase down source code to use a network file share instead of local storage! We’ll get to that shortly.
With my storage set up, I proceeded to connect to my virtual machine. Before starting the RDP session, I added a link to my local machine so that I could transfer the app’s code to the server.

Once connected, I proceeded to install the IIS web server onto the box. I also made sure to add ASP.NET support to the web server, which I forget to do roughly 84% of the time.

Now I had a web server ready to go. Next up? Copying files over. Here, I just took content from a local folder and put it into the wwwroot folder on the server.

My app was almost ready to go, but I still needed to update the web.config to point to my Azure file storage.

Now, how does my app authenticate with this secure file share? There’s a few ways you could try and do it. I chose to create a local user with access to the file share, and run my web app in an application pool acting as that user. That user was named seroterpluralsight.

What are the credentials? The name of the user should be the name of the Azure storage account, and the user’s password is the account key.

Finally, I created a new IIS application pool (pspool) and set the identity to the serverpluralsight user.

With that, I started up the app, and sure enough, was able to browse the network file share without any issue.

Step 2: Turn the virtual machine into an image
The whole point of a Scale Set is that I have a scalable set of uniform servers. When the app needs to scale up, Azure just adds another identical server to the pool. So, I need a template!
Note: There are a couple ways to approach this feature. First, you could just build a Scale Set from a generic OS image, and then bootstrap it by running installers to prepare it for work. This means you don’t have to build and maintain a pre-built image. However, it also means it takes longer for the new server to become a useful member of the pool. Bootstrapping or pre-building images are both valid options.
To create a template from a Windows machine, I needed to sysprep it. Doing this removes lots of user specific things, including mapped drives. So while I could have created a mapped drive from Azure File Storage and accessed files from the ASP.NET app that way, the drive goes away when I sysprep. I decided to just access the file share via the network path and not deal with a mapped drive.

With the machine now generalized and shut down, I returned to the Azure Portal and clicked the “capture” button. This creates an Azure image from the VM and (optionally) destroys the original VM.

Step #3: Create the Azure VM Scale Set
I now had everything needed to build the Scale Set. If you’re bootstrapping a server (versus using a pre-built image) you can create a Scale Set from the Azure Portal. Since I am using a pre-built image, I had to dip down to the CLI. To make it more fun, I used the baked-in Azure Cloud Shell instead of the console on my own machine. Before crafting the command to create the Scale Set, I grabbed the ID of the VM template. You can get this by copying the Resource ID from the Azure image page on the Portal.

With that ID, I put together the command for instantiating the Scale Set.
az vmss create -n psvmss -g pluralsight-practice --instance-count 2 --image /subscriptions/[subscription id]/resourceGroups/pluralsight-practice/providers/Microsoft.Compute/images/[image id] --authentication-type password --admin-username legacyuser --admin-password [password] --location eastus2 --upgrade-policy-mode Automatic --load-balancer ps-loadbalancer --backend-port 3389
Let’s unpack that. I specified a name for my Scale Set (“psvmss”) told it which resource group to add this to (“pluralsight-practice”), set a default number of VM instances, pointed it to my pre-built image, set password authentication for the VMs and provided credentials, set the geographic location, told the Scale Set to automatically apply changes, and defined a load balancer (“ps-loadbalancer”). After a few minutes, I had a Scale Set.

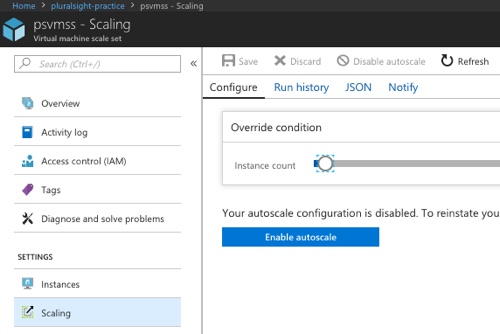
Neato. Once that Scale Set is in place, I could still RDP into individual boxes, but they’re meant to be managed as a fleet.
Step #4: Create a custom extension to update the configuration on each server in the fleet.
As I mentioned earlier, we’re not QUITE done yet. When you sysprep a Windows box that has an IIS app pool with a custom user, the server freaks out. Specifically, it still shows that user as the pool’s identity, but the password gets corrupted. Seems like a known thing. I could cry about it, or do something to fix it. Fortunately, Azure VMs (and Scale Sets) have the idea of “custom script extensions.” These are scripts that can apply to one or many VMs. In my case, what I needed was a script that reset the credentials of the application pool user.
First, I created a new Powershell script (“config-app-pool.ps1”) that set the pool’s identity.
Import-Module WebAdministration

Set-ItemProperty IIS:\AppPools\pspool -name processModel -value @{userName="seroterpluralsight"; password="[password]";identitytype=3}
I uploaded that file to my Azure Storage account. This gives me a storage location that the Scale Set can use to retrieve these settings later.
Next, I went back to the Cloud Shell to create couple local files used by the extension command. First, I created a file called public-settings.json that stored the location of the above Powershell script.
{

"fileUris": ["https://seroterpluralsight.blob.core.windows.net/scripts/config-app-pool.ps1"]

}
Then I created a protected-settings.json file. These values get encrypted are only decrypted on the VM when the script runs.
{

"commandToExecute": "powershell -ExecutionPolicy Unrestricted -File config-app-pool.ps1", "storageAccountName": "seroterpluralsight", "storageAccountKey": "[account key]"

}
That file tells the extension what to actually do with the file it downloaded from Azure Storage, and what credentials to use to access Azure Storage.
Ok, now I could setup the extension. Once the extension is in place, it applies to every VM in the Scale Set now, or in the future.
az vmss extension set --resource-group pluralsight-practice --vmss-name psvmss --name customScriptExtension --publisher Microsoft.Compute --settings ./public-settings.json --protected-settings ./protected-settings.json
Note that if you’re doing this against Linux boxes, the “name” and “publisher” have different values.
That’s pretty much it. Once i extended the generated load balancer with rules to route on port 80, I had everything I needed.

After pinging the load balanced URL, I saw my “legacy” ASP.NET application served up from multiple VMs, all with secure access to the same file share. Terrific!

Long term, you’ll be better off refactoring many of your apps to take advantage of what the cloud offers. A straight up lift-and-shift often resembles transferring debt from one credit card to another. But, some apps don’t need many changes at all to get some incremental benefits from cloud, and Scale Sets could be a useful route for you.
 What a fun year. Lots of things to be grateful for. Took on some more responsibility at