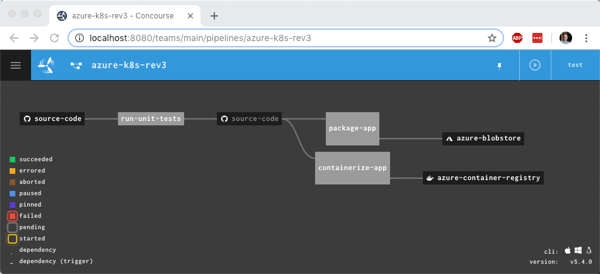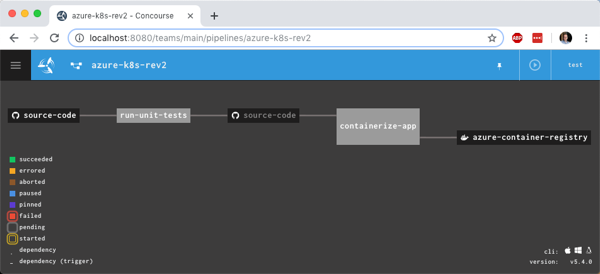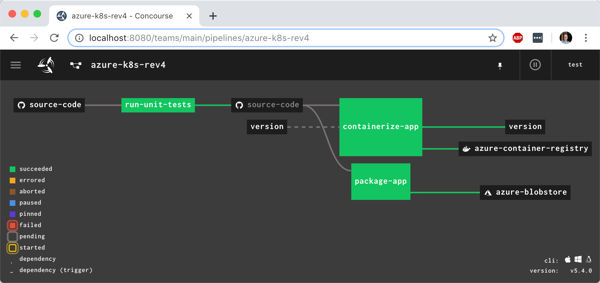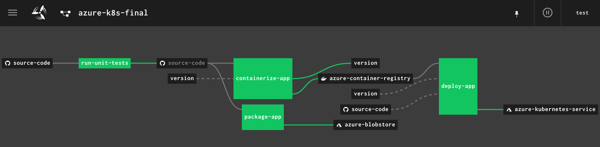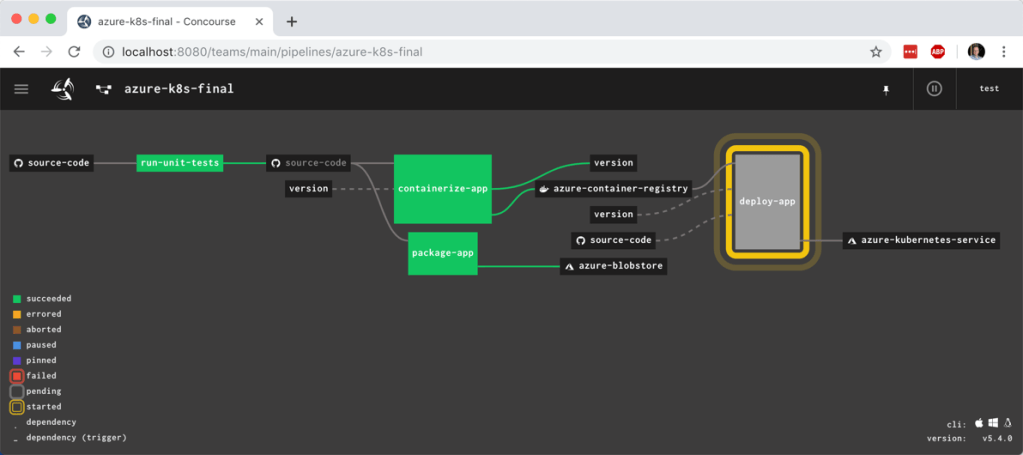
So far in this blog series, we’ve set up our local machine and cloud environment, and built the initial portion of a continuous delivery pipeline. That pipeline, built using the popular OSS tool Concourse, pulls source code from GitHub, generates a Docker image that’s stored in Azure Container Registry, and produces a tarball that’s stashed in Azure Blob Storage. What’s left? Deploying our container image to Azure Kubernetes Service (AKS). Let’s go.
Generating AKS credentials
Back in blog post one, we set up a basic AKS cluster. For Concourse to talk to AKS, we need credentials!
From within the Azure Portal, I started up an instance of the Cloud Shell. This is a hosted Bash environment with lots of pre-loaded tools. From here, I used the AKS CLI to get the administrator credentials for my cluster.
az aks get-credentials --name seroter-k8s-cluster --resource-group demos --admin
This command generated a configuration file with URLs, users, certificates, and tokens.
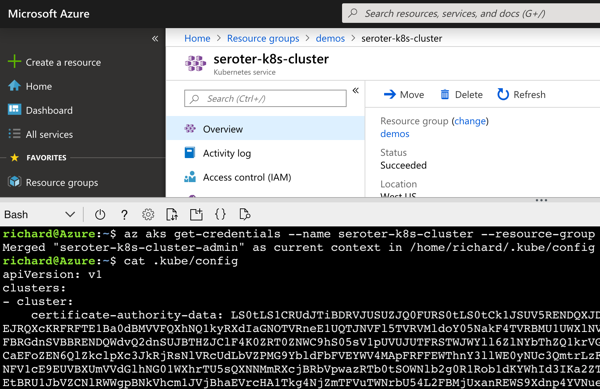
I copied this file locally for use later in my pipeline.
Creating a role-binding for permission to deploy
The administrative user doesn’t automatically have rights to do much in the default cluster namespace. Without explicitly allowing permissions, you’ll get some gnarly “does not have access” errors when doing most anything. Enter role-based access controls. I created a new rolebinding named “admin” with admin rights in the cluster, and mapped to the existing clusterAdmin user.
kubectl create rolebinding admin --clusterrole=admin --user=clusterAdmin --namespace=default
Now I knew that Concourse could effectively interact with my Kubernetes cluster.
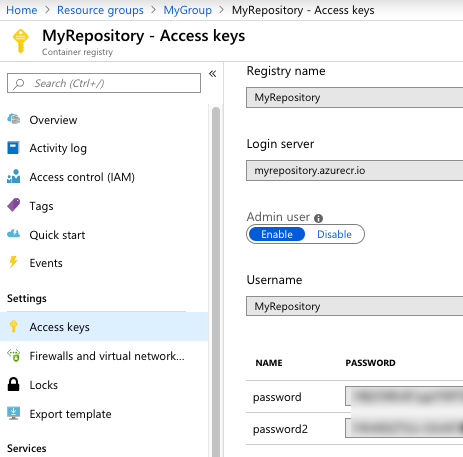
Giving AKS access to Azure Container Registry
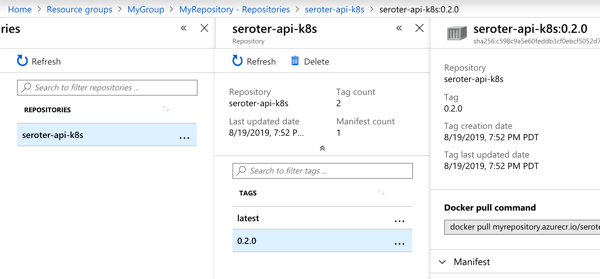
Right now, Azure Container Registry (ACR) doesn’t support an anonymous access strategy. Everything happens via authenticated users. The Kubernetes cluster needs access to its container registry, so I followed these instructions to connect ACR to AKS. Pretty easy!
Creating Kubernetes deployment and service definitions
Concourse is going to apply a Kubernetes deployment to create pods of containers in the cluster. Then, Concourse will apply a Kubernetes service to expose my pod with a routable endpoint.
I created a pair of configurations and added them to the ci folder of my source code.
The deployment looks like:
apiVersion: extensions/v1beta1
 kind: Deployment
 metadata:
   name: demo-app
   namespace: default
   labels:
     app: demo-app
 spec:
   replicas: 1
   template:
     metadata:
       labels:
         app: demo-app
     spec:
       containers:
       - name: demo-app
         image: myrepository.azurecr.io/seroter-api-k8s:latest
         imagePullPolicy: Always
         ports:
         - containerPort: 8080
       restartPolicy: Always
This is a pretty basic deployment definition. It points to the latest image in the ACR and deploys a single instance (replicas: 1).
My service is also fairly simple, and AKS will provision the necessary Azure Load Balancer and public IP addresses.
 apiVersion: v1
 kind: Service
 metadata:
   name: demo-app
   namespace: default
   labels:
     app: demo-app
 spec:
   selector:
     app: demo-app
   type: LoadBalancer
   ports:
     - name: web
       protocol: TCP
       port: 80
       targetPort: 80
I now had all the artifacts necessary to finish up the Concourse pipeline.
Adding Kubernetes resource definitions to the Concourse pipeline
First, I added a new resource type to the Concourse pipeline. Because Kubernetes isn’t a baked-in resource type, we need to pull in a community definition. No problem. This one’s pretty popular. It’s important than the Kubernetes client and server are expecting the same Kubernetes version, so I set the tag to match my AKS version.
resource_types:
- name: kubernetes
  type: docker-image
  source:
    repository: zlabjp/kubernetes-resource
    tag: "1.13"
Next, I had to declare my resource itself. It has references to the credentials we generated earlier.
resources:
- name: azure-kubernetes-service
  type: kubernetes
  icon: azure
  source:
    server: ((k8s-server))
    namespace: default
    token: ((k8s-token))
    certificate_authority: |
      -----BEGIN CERTIFICATE-----
      [...]
      -----END CERTIFICATE-----
There are a few key things to note here. First, the “server” refers to the cluster DNS server name in the credentials file. The “token” refers to the token associated with the clusterAdmin user. For me, it’s the last “user” called out in the credentials file. Finally, let’s talk about the certificate authority. This value comes from the “certificate-authority-data” entry associated with the cluster DNS server. HOWEVER, this value is base64 encoded, and I needed a decoded value. So, I decoded it, and embedded it as you see above.
The last part of the pipeline? The job!
jobs:
- name: run-unit-tests
[...]
- name: containerize-app
[...]
- name: package-app
[...]
- name: deploy-app
plan:
- get: azure-container-registry
trigger: true
passed:
- containerize-app
- get: source-code
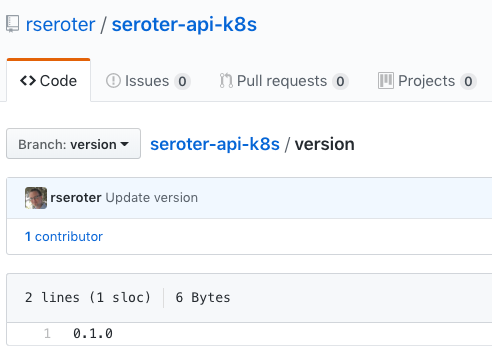
- get: version
- put: azure-kubernetes-service
params:
kubectl: apply -f ./source-code/seroter-api-k8s/ci/deployment.yaml -f ./source-code/seroter-api-k8s/ci/service.yaml
- put: azure-kubernetes-service
params:
kubectl: |
patch deployment demo-app -p '{"spec":{"template":{"spec":{"containers":[{"name":"demo-app","image":"myrepository.azurecr.io/seroter-api-k8s:'$(cat version/version)'"}]}}}}'
Let’s unpack this. First, I “get” the Azure Container Registry resource. When it changes (because it gets a new version of the container), it triggers this job. It only fires if the “containerize app” job passes first. Then I get the source code (so that I can grab the deployment.yaml and service.yaml files I put in the ci folder), and I get the semantic version.
Next I “put” to the AKS resource, twice. In essence, this resource executes kubectl commands. The first command does a kubectl apply for both the deployment and service. On the first run, it provisions the pod and exposes it via a service. However, because the container image tag in the deployment file is to “latest”, Kubernetes actually won’t retrieve new images with that tag after I apply a deployment. So, I “patched” the deployment in a second “put” step and set the deployment’s image tag to the semantic version. This triggers a pod refresh!
Deploy and run the Concourse pipeline
I deployed the pipeline as a new revision with this command:
fly -t rs set-pipeline -c azure-k8s-final.yml -p azure-k8s-final
I unpaused the pipeline and watched it start up. It quickly reached and completed the “deploy to AKS” stage.

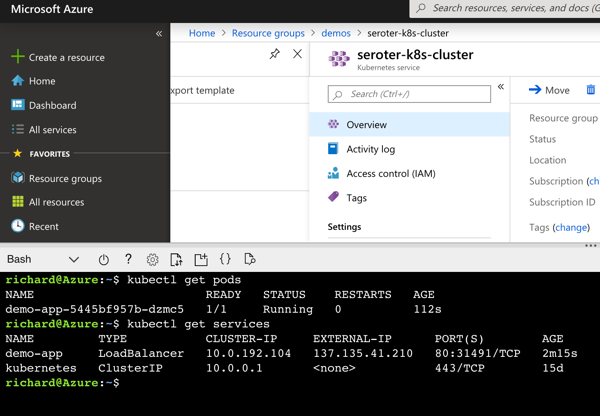
But did it actually work? I jumped back into the Azure Cloud Shell to check it out. First, I ran a kubectl get pods command. Then, a kubectl get services command. The first showed our running pod, and the second showed the external IP assigned to my pod.
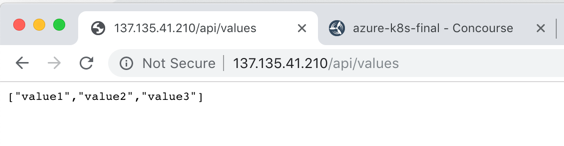
I also issued a request to that URL in the browser, and got back my ASP.NET Core API results.
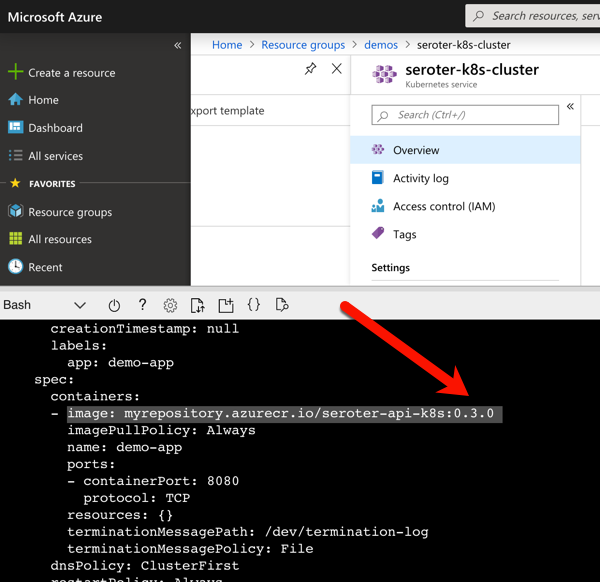
Also to prove that my “patch” command worked, I ran the kubectl get deployment demo-app –output=yaml command to see which container image my deployment referenced. As you can see below, it no longer references “latest” but rather, a semantic version number.
With all of these settings, I now have a pipeline that “just works” whenever I updated my ASP.NET Core source code. It tests the code, packages it up, and deploys it to AKS in seconds. I’ve added all the pipelines we created here to GitHub so that you can easily try this all out.
Whatever CI/CD tool you use, invest in automating your path to production.