Years ago, I could recall lots of phone numbers from memory. Now? It’d be tough to come up with more than two. There’s so many ways to contact each person that I know (phone, email(s), Twitter, WhatsApp, etc) and I depend heavily on my address book. As you start using microservices in your architecture, you’ll discover that you also need a good address book to find services at runtime. But unlike classic solutions such as configuration management databases or UDDI registries, a modern “address book” is different. Why? As microservices get deployed, scaled, and updated, their “address” is fluid. To account for that, any modern address book cannot have stale references. Enter Eureka from Netflix. While baked into Spring Cloud for Java users, Eureka isn’t easily available to .NET microservices. That changed with the OSS Steeltoe library, and I thought I’d show that off here.
Building a Eureka Server
Thanks to Spring Cloud, it’s easy to set up a Eureka registry for your services to talk to.
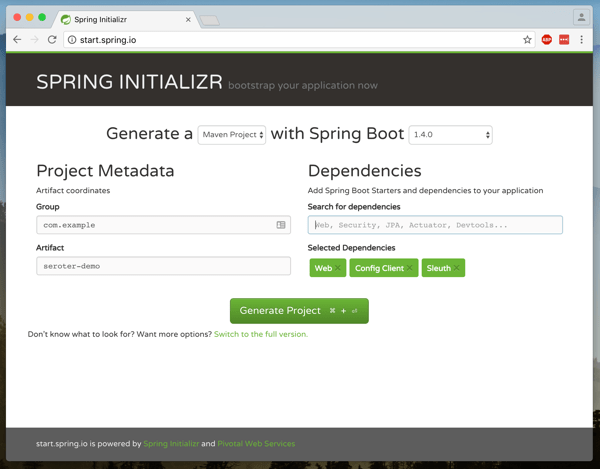
First, I used Spring Tool Suite to build a new Spring Boot app. In the app creation wizard, I chose the “Eureka Server” package dependency (spring-cloud-starter-eureka-server). If you aren’t using Spring Tool Suite, check out the awesome web-based Spring Intializr to generate project scaffolding to import into any Java IDE.

Next up, there was a LOT of code to write to bring up a Eureka server.
@EnableEurekaServer
@SpringBootApplication
public class PsPlaceholderEurekaServerApplication {

  public static void main(String[] args) {
    SpringApplication.run(PsPlaceholderEurekaServerApplication.class, args);
  }
}
Seriously, that’s it. Bonkers. All that remained was adding a few properties. I set a couple of cosmetic properties (“datacenter” and “environment”), and then told Eureka to NOT register itself with the server, and to NOT retrieve a copy of the registry.
server.port=8761

# value used for AWS, here can be anything
eureka.datacenter=seattle
eureka.environment=prod

# no need to register the server with the server
eureka.client.register-with-eureka=false

# don't need a local copy of the registry
eureka.client.fetch-registry=false
I started up the app, navigated to the right URL, and saw the Eureka Server dashboard. There was a bunch of system status info, and an (empty) list of registered servers. Note that Eureka stores its registry in memory. The registry is a live look at the environment because services send a heartbeat to state that they’re online. No need to persist anything to disk.

Building a Eureka Server (Alternative, No-Java Way)
Now you might say “I don’t know Java and don’t want to learn it.” Fair enough. If you’re a Pivotal customer, than you’re in luck. Spring Cloud Services bundles up key Spring Cloud projects and runs them “as a service” in your Cloud Foundry environment. One such service is the Eureka Service Registry. You can try this out for free in Pivotal Web Services.

After clicking a couple buttons, and waiting about 30 seconds, I had a registry! No Java required.

Registering a Java Service
Great, I had a registry. Now what? I wanted to add a Java and .NET service to my local registry.
First up, Java. I created a new Spring Boot application, and chose the “Eureka Discovery” package dependency (spring-cloud-starter-eureka).
I set up a super awesome REST service that says “hello from Spring Boot.” What about registering with Eureka? It took a single @EnableEurekaClient annotation in my code.
@EnableEurekaClient
@RestController
@SpringBootApplication
public class PsPlaceholderEurekaServiceApplication {

   public static void main(String[] args) {

      SpringApplication.run(PsPlaceholderEurekaServiceApplication.class, args);
   }

   @RequestMapping("/")
   public String SayHello() {
      return "hello from Spring Boot!";
   }
}
In the bootstrap.properties file, I set the “spring.application.name” property. This told Eureka what to label my service in the registry. In my application.properties file, I specified that I should register with Eureka, and to send health data along with my service’s heartbeat.
eureka.client.register-with-eureka=true
eureka.client.fetch-registry=false

#can intentionally set the host name
eureka.instance.hostname=localhost

eureka.client.healthcheck.enabled=true
With this in place, I started up my Java service, and sure enough, saw it in the Eureka registry. Cool!

Registering a .NET Service
.NET developers, rejoice! We can enjoy all kinds of microservices goodness by using libraries like Steeltoe. And it works with .NET Framework and .NET Core apps.
In this example, I chose to use .NET Core. Here’s my sequence of commands in the wicked .NET Core CLI:
dotnet new webapi
dotnet add package Steeltoe.Discovery.Client -v 1.0.0-rc2
dotnet restore
dotnet build
dotnet run
Just running those commands gave me a Web API project with a dependency on Steeltoe’s discovery package. The latter two commands built and ran the app itself.
The “webapi” project shell sets up a default REST controller, and for this demo, I just kept that. The only necessary code changes occurred in the Startup.cs class.
Here, I added a using directive for “Steeltoe.Discovery.Client”, and updated the ConfigureServices and Configure operations to each include references to the discovery client.
// This method gets called by the runtime. Use this method to add services to the container.
 public void ConfigureServices(IServiceCollection services)
        {
            // Add framework services.
            services.AddMvc();
            services.AddDiscoveryClient(Configuration);
        }

// This method gets called by the runtime. Use this method to configure the HTTP request pipeline.
public void Configure(IApplicationBuilder app, IHostingEnvironment env, ILoggerFactory loggerFactory)
        {
            loggerFactory.AddConsole(Configuration.GetSection("Logging"));
            loggerFactory.AddDebug();

            app.UseMvc();
            app.UseDiscoveryClient();
        }
Finally, I added a few entries to the appsettings.json file. First I set a “spring.application.name” value, just like I did with my Spring Boot app. This tells the registry what to label my service. Then I have a block of Eureka settings including the registry URL, whether I should register with Eureka (yes!), pull a local copy of the registry (no!), and how to find my instance.
{
  "Logging": {
    "IncludeScopes": false,
    "LogLevel": {
      "Default": "Warning",
      "System": "Information",
      "Microsoft": "Information"
    }
  },
  "spring": {
    "application": {
      "name":  "dotnet-demo-service"
    }
  },
  "eureka": {
    "client": {
      "serviceUrl": "http://localhost:8761/eureka/",
      "shouldRegisterWithEureka": true,
      "shouldFetchRegistry": false
    },
    "instance": {
      "hostname": "localhost",
      "port": 5000
    }
  }
}
When I ran the “dotnet build” and “dotnet run” commands, I saw my .NET service show up in the Eureka registry. BAM!

Performing Discovery From a Java App
It’s all nice and good to have an up-to-date address book, but it’s kinda worthless if nobody ever calls you!
How would I yank service information from the registry for a Java app? It’s easy. First, I created a new Spring Boot project, and used the same “Eureka Discovery” package dependency (spring-cloud-starter-eureka) as before.
In the application properties file, I specified that I *do* want a local copy of the registry, but do *not* need to register the client app as an available service. I’m just a client here, so no need to do register or give heartbeats.
server.port=8081
eureka.client.register-with-eureka=false
eureka.client.fetch-registry=true
eureka.client.healthcheck.enabled=false
In my application code, I annotated my main class with @EnableDiscoveryClient, created a load balanced RestTemplate bean, autowired a variable to it, and then defined an operation that used it.
@EnableDiscoveryClient
@SpringBootApplication
public class PsPlaceholderEurekaServiceConsumerApplication {

  public static void main(String[] args) {
    SpringApplication.run(PsPlaceholderEurekaServiceConsumerApplication.class, args);
  }

  @LoadBalanced
  @Bean
  public RestTemplate restTemplate(RestTemplateBuilder builder) {
     return builder.build();
  }
}

@RestController
@Component
class ConsumerController {

  //available now with load balanced bean
  @Autowired
  private RestTemplate restTemplate;

  @RequestMapping("/service-instancesrt")
  public String GetServiceInstancesRt() {

    String response = restTemplate.getForObject("http://dotnet-demo-service/api/values", String.class);
    return response;
  }
}
What’s pretty cool is that RestTemplate object is injected with enough smarts to replace the service name from the registry (“dotnet-demo-service”) with the actual URL when it makes the API call. When I invoked my local endpoint, it passed through the request to the microservice it looked up in the registry, and returned the result.

Performing Discovery From a .NET App
Finally, let’s see how a .NET app would pull a reference from the Eureka registry and use it.
I created a new project based on the ASP.NET Core MVC template. And then I added the Steeltoe package for service discovery.
dotnet new mvc
dotnet add package Steeltoe.Discovery.Client -v 1.0.0-rc2
dotnet restore
With this MVC template, I got some basic scaffolding for a sample website. I just extended this by adding a new view (called “Demo”) and controller method. No content in the method right away.
Just like before, I updated the Startup.cs class by first adding a reference to “Steeltoe.Discovery.Client” and updating the “ConfigureServices” and “Configure” methods.
ASP.NET Core offers some nice dependency injection stuff. So with the code update above, I now had a “DiscoveryClient” object available for any controller or service to use. So, back in the controller, I added a variable for DiscoveryHttpClientHandler. Then I instantiated that object in the controller constructor, and used it in the new controller method to call a Eureka-registered Java service. Note once again that I only needed the registered service name, and the client libraries flipped this to the address/port of my actual service.
public class HomeController : Controller
{
  //added for demonstration
  DiscoveryHttpClientHandler _handler;

  public HomeController(IDiscoveryClient client) {
      _handler = new DiscoveryHttpClientHandler(client);
  }

  public IActionResult Demo()
  {
      HttpClient c = new HttpClient(_handler, false);
      //call service using registered alias
      string s = c.GetStringAsync("http://boot-customer-service").Result;

      ViewData["Message"] = "Service result is: " + s;

      return View();
   }
}
Finally, I added a few things to my appsettings.json file so that the Steeltoe client library knew how to behave. I gave the application a name, and told it to *not* register itself with Eureka, but only to fetch the registry and cache it locally.
{
  "Logging": {
    "IncludeScopes": false,
    "LogLevel": {
      "Default": "Warning"
    }
  },
  "spring": {
    "application": {
      "name":  "dotnet-demo-service-client"
    }
  },
  "eureka": {
    "client": {
      "serviceUrl": "http://localhost:8761/eureka/",
      "shouldRegisterWithEureka": false,
      "shouldFetchRegistry": true
    },
    "instance": {
      "hostname": "localhost",
      "port": 5001
    }
  }
}
After that, I started up by ASP.NET Core app, hit the webpage, and saw a result from my Spring Boot service.

That was fun! Some sort of service registry is extremely helpful when adopting a microservices architecture. Instead of using hard-coding references or stale data stores, an always-accurate registry gives you the best chance of surviving in a fluid microservices environment. Now, thanks to Steeltoe, you can use the same registry for your Java, .NET (and even Node.js) services.