I’m working on a BizTalk project where we’re testing the use of security certificates, and I’ve just had a bear of a time finding thorough walkthroughs of setting this up. It’s barely mentioned in the available BizTalk books, and while the BizTalk 2004 whitepaper (which has now been added to the BizTalk 2006 documentation) has some very nice coverage, it wasn’t exactly what I wanted. So, after much toil (and threats of lighting myself on fire), I present a step-by-step for building a certificate scenario using test certificates.
I’ve used the .NET Framework tool makecert to build local test certificates. The hardest part for me was getting the correct series of command line parameters to build the cert I wanted. I finally put together one that worked:
makecert -r -pe -n “CN=www.seroter.com” -b 02/01/2007 -e 01/01/2036 -eku 1.3.6.1.5.5.7.3.1 -ss my -sr currentuser -sky exchange -sp “Microsoft RSA SChannel Cryptographic Provider” -sy 12
For a description of the available parameters, check out the MSDN page for makecert.
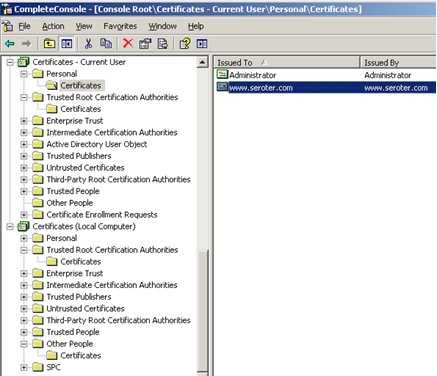
What this did, was create a (self-signed) certificate, and placed it in my “current user” personal store.
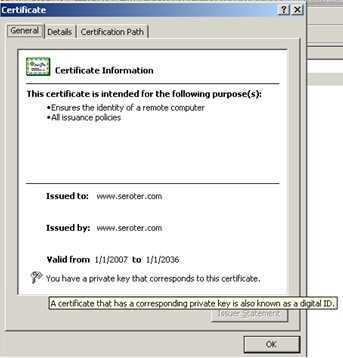
You can see from the shot here that the certificate’s private key is included.
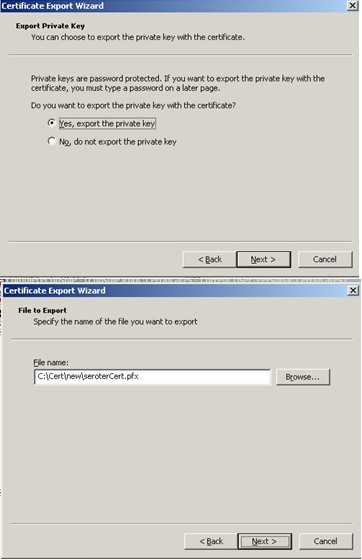
So first, I exported the private key certificate out. To do this, I selected the certificate, right-clicked, and chose export. As you can see below, I chose to Yes, export the private key and created the .pfx file.
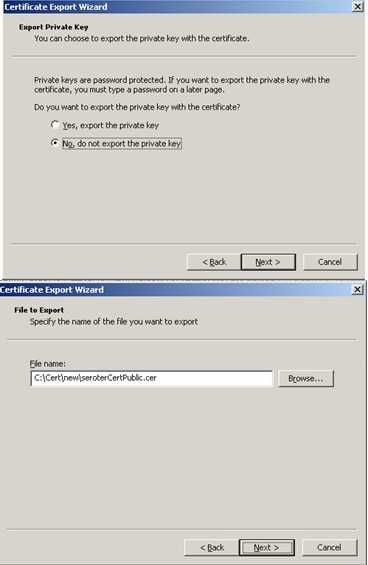
Next I exported the public key. This is the one that I would give partners. I selected the certificate again, right-clicked and exported. This time, I chose not to export the public key, and created a .cer file.
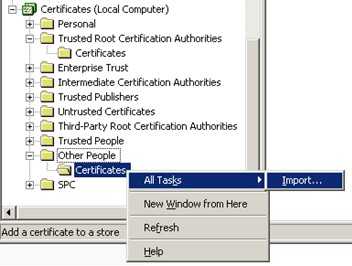
Now I jumped into the Other People certificate store to import the public certificate (.cer file). Why? Well the Current User/Personal/Certificates store is where certificates go for decrypting inbound messages. This store is account specific, so I’m using the account that the receiving host is running under. The store under the Local Computer/Other People/Certificates is for public certificates used to sign outbound messages. The “other people” then have a corresponding private key to decrypt the inbound messages.
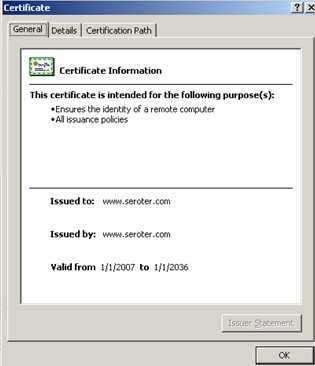
As you can see here, the public certificate doesn’t have a private key attached.
Within BizTalk, I created both send and receive pipelines. The send pipeline has the MIME/SMIME Encoder component included with the Enable Encryption set to true.
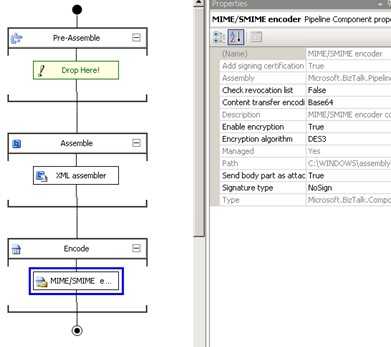
The receive pipeline has the MIME/SMIME Decoder component.

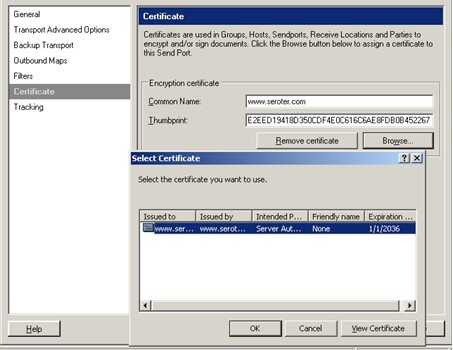
Within my send port (which uses my new send pipeline), I set up the Certificates tab to point to the public certificate. The Browse button pulls up any certs in the Other People store.
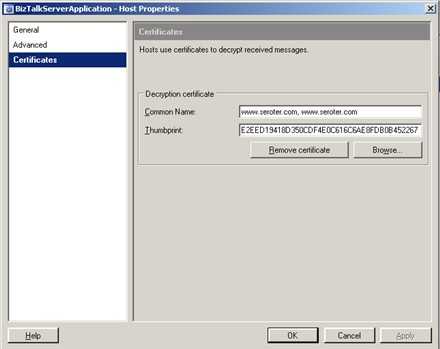
Finally, the BizTalk Host that contains the receive pipeline (and port) must be configured. The host has a Certificates tab where once again I can browse. This time, it looks for the Personal store of the BizTalk Host account.
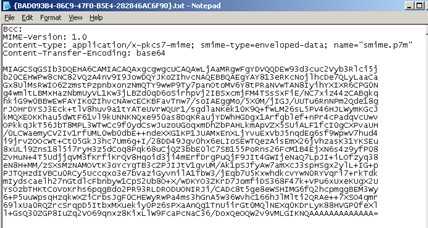
After creating a local folder structure for dropping off and picking messages up (e.g. pick up clear text, drop off encrypted, pick up encrypted, drop off clear text), and setting up the ports, the “encryption” send port outputs the following message …
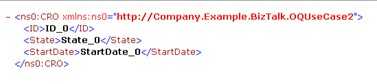
After picking the encrypted message up, BizTalk decrypts it and sends me this …
There you go. Let me tell you, there was a LOT of silent fist-pumping in my office this afternoon after I got this working. Hopefully someone else finds this useful as well!
Technorati Tags: BizTalk

Leave a reply to Carlos Dias Cancel reply